
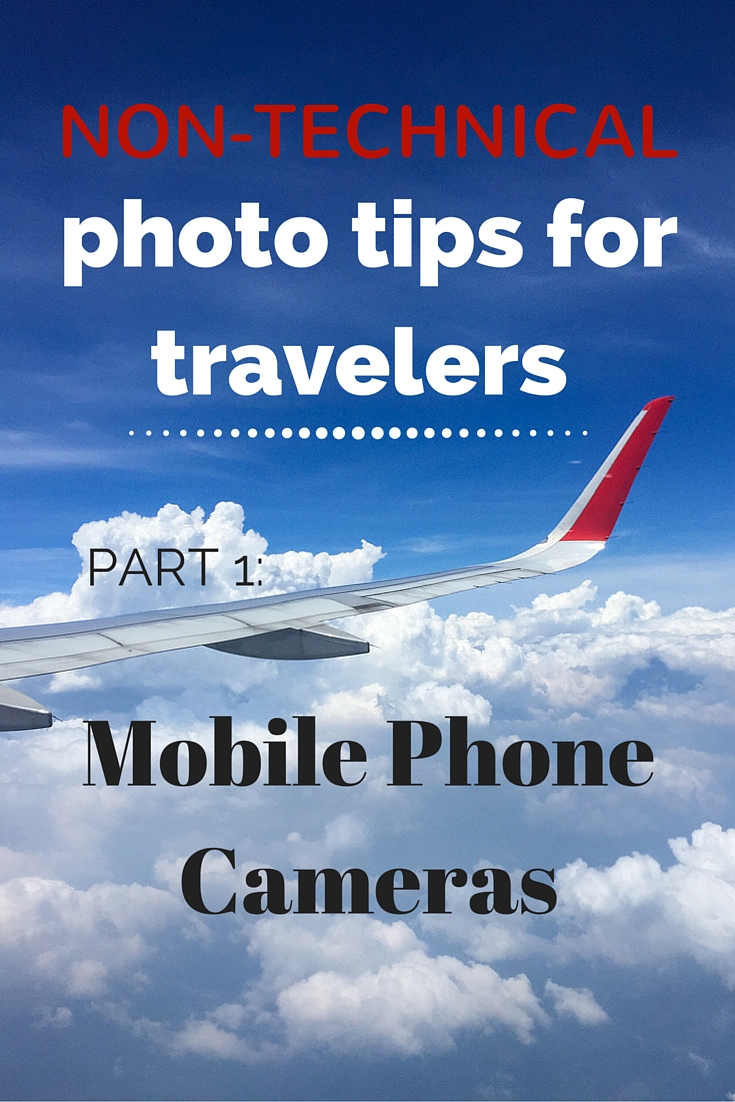
Welcome to my series on non-technical photo tips! This series is aimed at improving travel photos with the tools that you have on the road, but these tips will work for those at home too, of course. Hopefully you have read the series introduction post that explains some photography basics for any camera. If not, I highly recommend reading that first to give you a good foundation from which to read any post in this series. I will be referring back to many of the principles covered in that post. Here it is for your reference.
Okay, now that you have (hopefully) read that post, I can carry on with this one. This first post in the non-technical photo tips series will cover the camera that we all probably have in our pockets or purses: the mobile phone. While a lot of this post can be generally about any phone, many of my tips will refer to iPhones. However, I have recruited help from some fellow travel bloggers and photographers for more tips to include a wider range of phones. And if something I or my contributors say doesn’t apply to your phone, then feel free to point out how your phone might be different or add your own phone-specific tip in the comments.
Where cell Phones excel
I have to say that I’m not a huge fan of phone photography (Except for panos. Yay!), but I have to admit that some phones are built to take pretty great photos. However, just as with any camera, you still have to take control in order to make the best of any photo-worthy situation. Just keep in mind that no matter how advanced you are at using your phone as a camera, chances are that you can improve your skills by reading that earlier post that I keep referring to. ;)
They say that the best camera is the one you have with you
If this is true then a lot of times, your phone will be the best camera, if not your only camera. I carry my DSLR around a lot, especially when I’m traveling, but sometimes it’s just inconvenient to have with me all the time. Occasionally I have kicked myself for leaving my camera behind when something interesting comes along, but at least I have my phone. Phones are great for capturing moments when you don’t have a nicer camera, if you don’t feel like getting it out of your bag, or if it’s easier to use your phone instead. Even if I have my camera with me, I’ll often opt for a quick snap with my phone to capture life’s quirks and oddities.

Just out for breakfast at a new place. How could I know to expect such a work of art on our table?
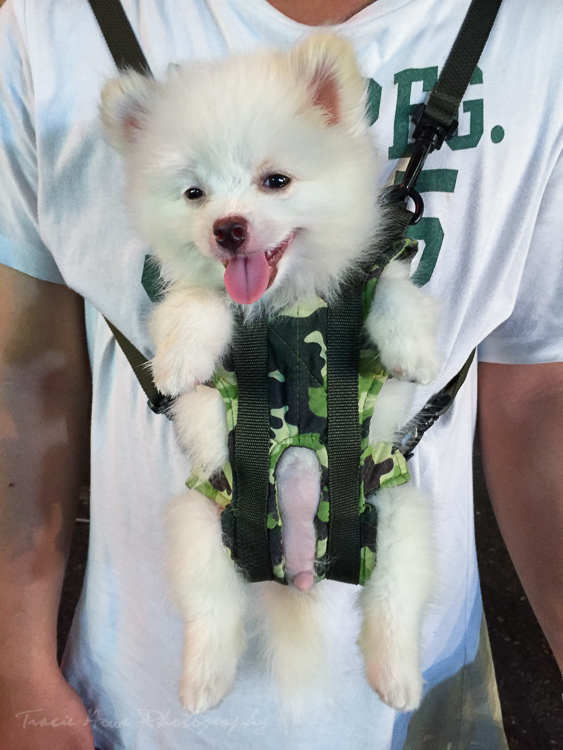
This little guy was so cute, I couldn’t help but snap a photo. What a weird way to take your dog around, eh?
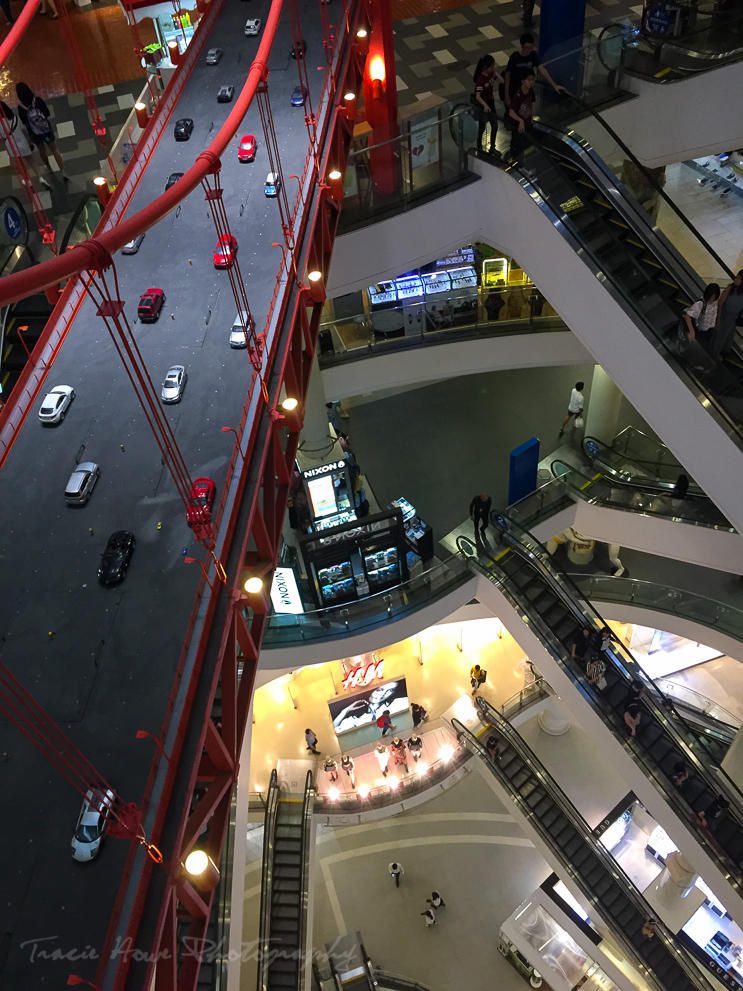
One of Asia’s crazy impressive malls! I didn’t have my DSLR with me to capture this model of the Golden Gate bridge hanging above the escalators, so I whipped out my phone for a shot.

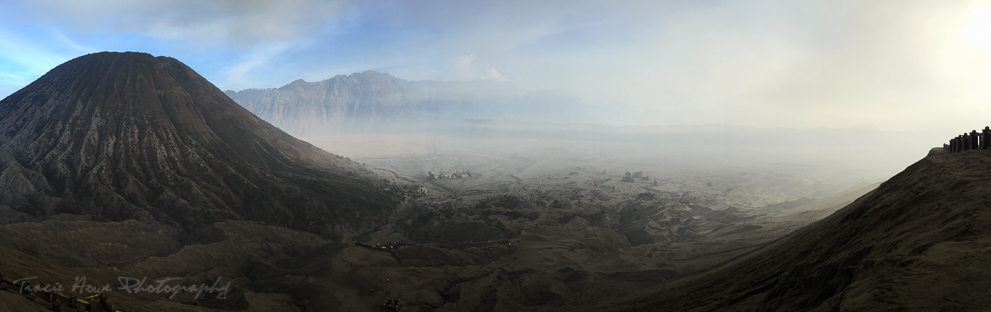
I couldn’t carry my DSLR with me while I skied, but at least I had my phone to capture this beautiful mountain from the chair lift.
Easy Panoramics
If pano is just an iPhone feature, then I think it’s the number one reason to get an iPhone! It’s the reason I bit the bullet and finally upgraded to the iPhone 6. Ironically, I forget to use it a lot of the time because I’m so focused on using my “big girl camera”. But when I do… wow! I mean you have to have steady hands and a wide open view, but the results of a good pano can be pretty spectacular!


Great for Macro
Phones often win in the macro category when compared to a DSLR and a basic lens. The problem with a lot of lenses is that they won’t focus if you are too close to a subject. Every lens has a minimum distance for focusing, but phones (at least iPhones) seem to be able to focus at much closer distances. Sometimes I will turn to my phone instead of my camera to capture close up details.
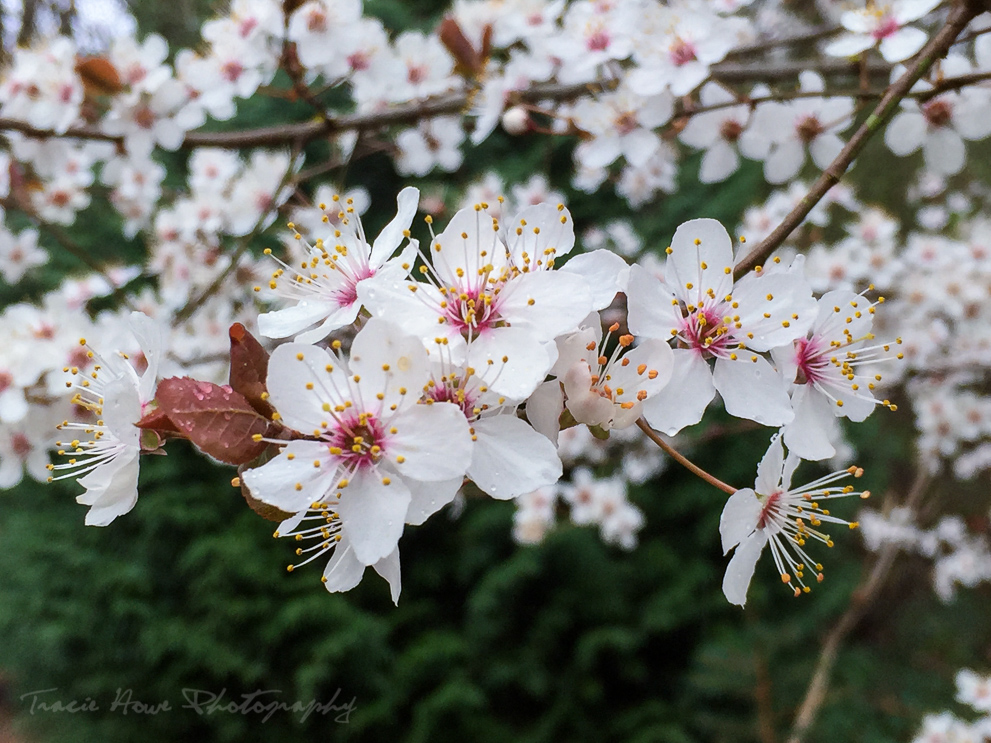
A quick capture while out and about with my phone.
One of Asia’s crazy impressive malls! I didn’t have my DSLR with me to capture this model of the Golden Gate bridge hanging above the escalators, so I whipped out my phone for a shot.
Mobility, of course!
You can’t beat the mobility of phones for sharing. Instagram is so huge because it’s so easy to snap, edit, and share photos from a phone. I rarely share phone photos to Instagram anymore, but I still download my edited DSLR photos from Dropbox, edit a little more and then share from my phone. It’s just too easy!

I had my camera with me when I shot this tree in New Orleans, but I knew I couldn’t share the photo right away if I didn’t use my phone.
Quick tips for improving mobile phone photography
Below is a list of the tips and tricks I’ve collected for taking photos with a phone (FYI: I’ll cover editing in a later post). Thanks to my contributors, we have a few non-iPhone specific tips scattered in here too, so I’ll designate which phones each tip applies to when necessary. If one of the tips is designated for a specific phone, that doesn’t mean it is necessarily limited to that phone. It’s possible that your phone also has a similar capability, so I welcome you to experiment and report back in the comments.
Quickly access your phone’s camera
Paula McInerney of Contented Traveller has a great tip that is easy to forget until you need it. “Often we see something amazing, but by the time we put in the pin code on the phone to get out of the lock screen, or find the app, the moment has passed. Don’t forget you can Swipe Up For Quick Access.” If your phone is off (asleep), just click the home button (the circle at the bottom) and swipe up from the camera icon that appears at the bottom of the screen. If your phone is in use, swiping up from the bottom will show you a menu with some of your apps, including your camera. – Works for: iPhone 6
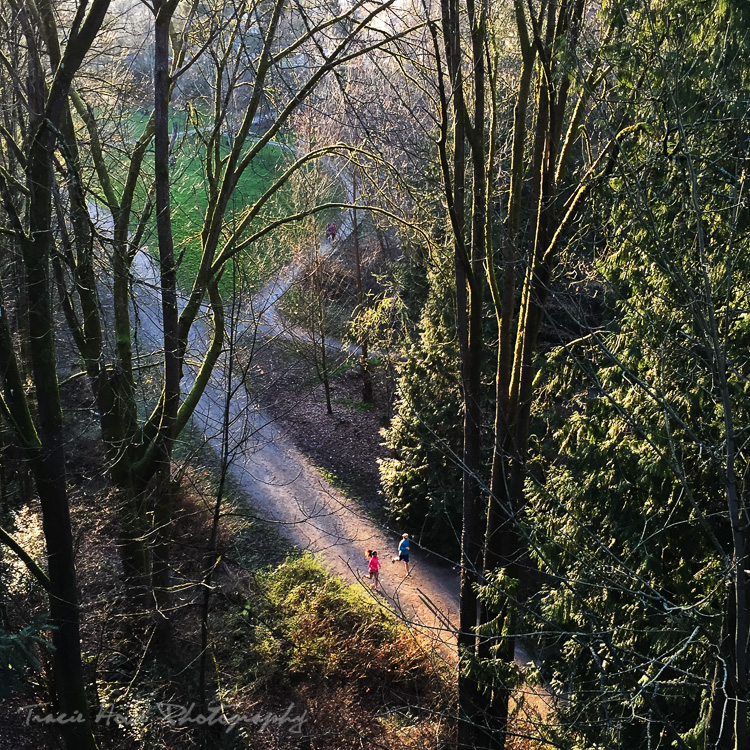
Quick access allowed me to capture these runners in the pretty light before they ran out of the scene.
If given the option to increase your quality, do it!
One of the disadvantages of using phones as cameras is the poor image quality. While some phones do have a high megapixel count, a lot of people don’t realize that they can still up the ante! Make sure you know whether your phone has the ability to change resolution, because you’ll want it at the highest setting if you care about quality. Just be aware that larger photos will take up more space.
Some cameras, like the Nexus 6 and the iPhone 6, allow you to change the aspect ratio of your photos before you shoot. This basically pre-adjusts your photo dimensions. It’s my understanding that more of the image quality will be preserved if you end up shooting a smaller aspect ratio (such as a square) image before shooting, rather than cropping the photo afterwards. – Works for: Nexus 6 and iPhone 6
I didn’t even know RAW was possible on phones until Brian Shrader of Nomadistan informed me that the OnePlus phone has a RAW option in addition to jpeg. He says “…it’s still a tiny cell phone sensor, but you can get the uncompressed image to edit”. Every time a jpeg is saved, pixels get compressed, but a RAW file saves you from gradually destroying perfectly good pixels. I suggest using RAW to give you the best quality possible if you have such an option! – Works for: OnePlus
Don’t forget all of your shooting modes
Phones have different shooting modes that shouldn’t be ignored. These will often perform better than any tools you can edit with later. On the iPhone 6 you have the ones listed at the bottom of the Camera app: time-lapse, slo-mo, video, photo, square, and pano, which I’ve already gushed over. I don’t often use much besides photo, video, and pano, but I recommend experimenting with them because you might fall in love with one. Don’t forget burst mode, a hidden feature, which allows you to take a series (or burst) of shots in quick succession. To do this, simply hold down the camera shutter button. This is great for fast action photography, where you can choose the best image after your burst. – Works for: iPhone 6

After hopping off the back of this truck, I quickly pulled out my phone to snap this photo as the truck pulled away. Quick access and burst mode served me well here!
Laura Lynch of Savored Journeys shares some cool shooting modes from her Samsung phone: “On my Galaxy S4, there are 12 shooting modes that make taking photos on my phone much better. The two I like the most are Eraser and Best Face. Eraser mode automatically removes moving objects that invade your photo. So, if you’re taking a photo of the Eiffel Tower and someone walks into the picture, Eraser removes it. Best Face automatically takes 5 photos to make sure you get the best expression from everyone, then merges them into one best photo.” – Works for: Samsung GalaxyS 4
One of the shooting modes I don’t recommend is the filtered mode. Lance and Laura Longwell of Travel Addicts warn “don’t use the built in filter software on the camera. Take your photos normally, and then apply filters later.” Not only do you lose a perfectly clean image with a lot of potential for editing later, but you may just not like the result. Skip the filtered shooting if you have it! – Works for: iPhone 6
Careful with that zoom
I couldn’t get any closer to this, so I had to zoom in a bit. Not too much though! ;)
Use your sound control buttons to take a photo
When I learned this, I felt so much relief in being able to have my thumb free to balance the phone better! It’s sort of like holding a traditional camera. I discovered recently that this is not just an iPhone hack, so be sure to check if it works for your phone too. – Works for: iPhone 6 and Samsung Gallaxy S5
Joe Ankenbauer of Joeography says that you can “take photos using the iPhone headphones. Just like using the volume buttons on your phone, you can use the volume control on the headphones to take pictures as well. This helps if you want to minimize movement or even take a large selfie!” – Works for: iPhone 6
Use the grid
Joe Ankenbauer of Joeography has provided another tip that I didn’t even know about. He says that you can “turn on the grid”, a tool that helps you with straight horizons and obtaining pleasing compositions (remember all those composition rules in the other post?). On an iPhone 6, you can turn on the grid in your Phone & Camera settings. – Works for: iPhone 6
Control focus
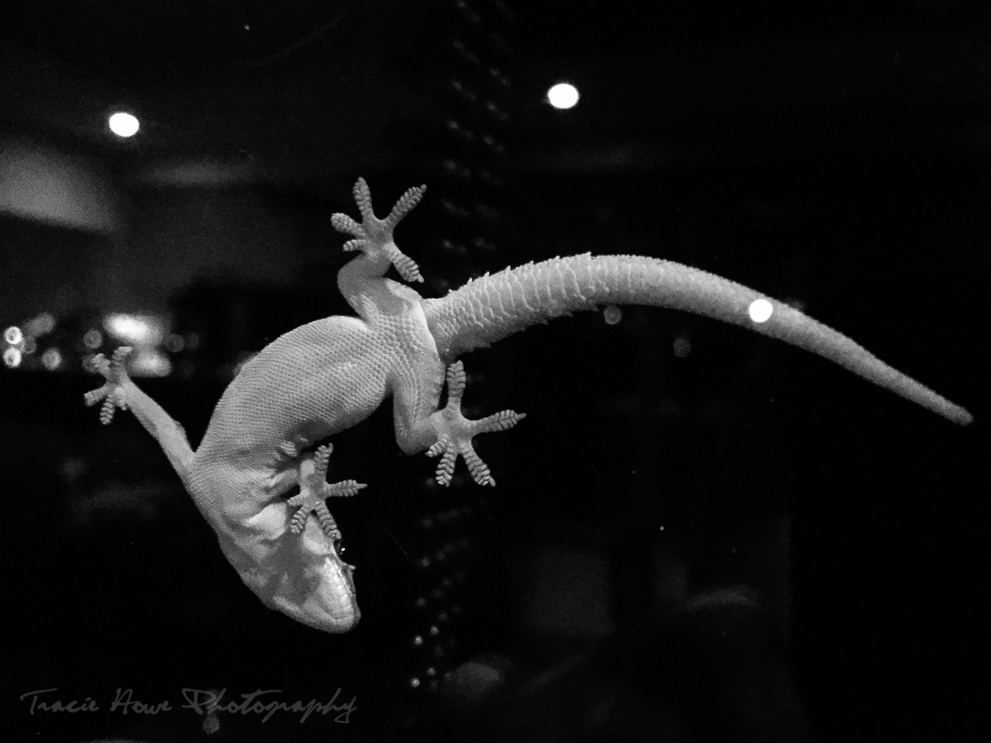
Focusing can be as simple as waiting patiently for autofocus to adjust, but sometimes you want to take more control over your focus. On the iPhone, you can isolate your focus by tapping the screen on your subject. Lock the focus by holding your finger on that spot until the AE/AF Lock notice appears, so you are free to adjust your composition and exposure. – Works for: iPhone 6
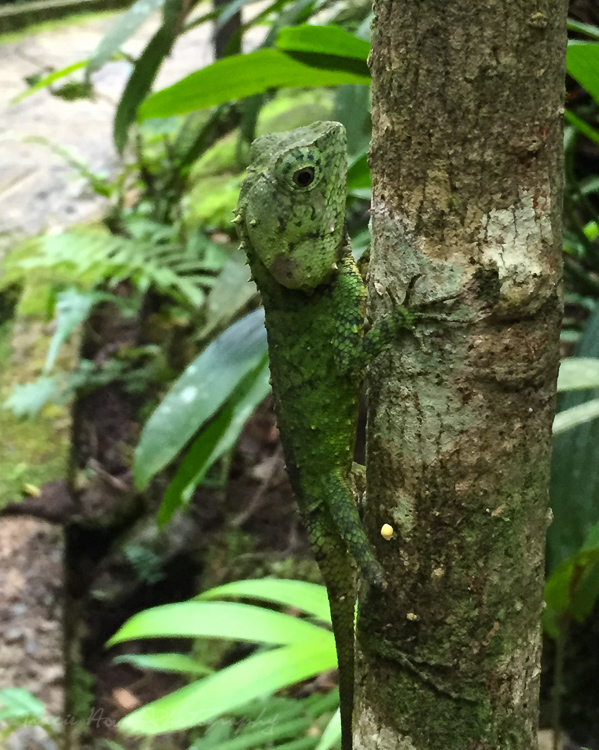
Here I locked focus on the lizard. Focusing on the lizard worked to blur the background a bit, which is a creative technique for isolating your subject… something I covered in the last post.
Control exposure
Just like focusing, you can control your exposure on the iPhone 6 by holding down your finger until the sun symbol appears with a little box. Move the sun up or down to overexpose or underexpose your subject. Use the AE/AF Lock trick (mentioned above) first to be able to lock the exposure. Now you can make those dark places lighter without using your flash! – Works for: iPhone 6
Here I locked focus on my DSLR camera and increased the exposure just enough to show a little foreground detail there without making the background too bright.
HDR is also another way to control your exposure and many phones offer this function. The most basic explanation of HDR is that it blends different exposures to create a more even, average exposure. This works best for scenes that are very bright in some areas and very dark in other areas. Sometimes a phone’s HDR setting can do a pretty good job, but it’s sort of hit or miss. I will always try HDR before I turn to flash. – Works for: iPhone 6 and Nexus 6
These signs looked dark on my phone because of the bright background. HDR puts the dark and light areas together to create a more even exposure.
We’ve all seen what flashes can do, which is why I always have mine off until I need it. Improper use of flash can light up a scene too much in some areas and give us the appearance of ghosts or aliens. However, sometimes a flash must be used as a last resort. Just experiment with distance between you and your subject to add the optimal amount of light. – Works for: any smart phone
And when all else fails in getting your preferred exposure, sometimes you just have to get creative! Deirdre Toomey of DancinDeirdre says “embracing silhouettes helps” with this. :) Use the trick mentioned above to underexpose a scene for a silhouette, like the one below. –Works for: iPhone 6

Use your timer
Lenses for cell phones
I have heard about these, but I have yet to use them. I’ve heard some good things and some bad. I would love to try some, but alas, I can only tell you that they exist. Presumably they work just like a normal lens to magnify or distort the photo before it becomes pixels. A few affordable brands to consider are: Olloclips and Photojojo (which offers some fun photo stuff all around!). Pricier, but probably higher quality options are: the iPro Lens System and Moment lenses. Again, I haven’t used any of these, but I’d be happy to try them out some day.
Review your photos
Add your tip
I’d love for this post to be a resource for people to refer to when trying to improve their mobile phone photography. I welcome you to add your tip in the comments if it hasn’t already been mentioned, or let me know if one of the existing tips also works for your phone. Hopefully this will help others out in the future who might stumble upon this post. Thanks to those who have already contributed!
Happy shooting and don’t forget to continue with the series. You can also subscribe to get updates delivered to your inbox!
I'd love for this post to be a resource for people to refer to when trying to improve their mobile phone photography. I welcome you to add your tip in the comments if it hasn't already been mentioned, or let me know if one of the… Click To Tweet
Find each post from the series below:
Introduction – Non-technical Tips for Any Camera
Part 2 – Point and Shoot Cameras
Part 3 – Intro to DSLR Cameras
Part 5 – Desktop and Mobile Editing
*All opinions and photos are my own and based on my experiences, unless otherwise noted. I was not compensated in any way for this post.
![]()


Chris - All relevant for me, as I finally have a phone with reasonable camera functionality (it isn’t an iPhone however, I’m a touch anti Apple).
That said, I still love our compact point and shoot camera as it just as easily fits in a pocket, and just as easily snaps a photo quickly!
traciehowe - Great! Glad you could find something useful in this post despite your aversion to Apple! ;) Point and shoots are next in the series!
Jackie - Hi Tracie
I have a Droid Maxx, and I love this tip. When you don’t have time to put in your pin number and select your camera, you just shake the phone back and forth. It automaticly goes to the camera and all you have to do is point and take the picture. This is great when your caught off guard and not prepared.
traciehowe - Hi Mom! That’s a great tip! I didn’t know about that one for Droid Maxx. Thank you for sharing it! :)
Laura - This is a really great resource! I’m really lazy about learning the extra features on my phone camera (or any camera, for that matter), so this is going to help me immensely. You put a ton of work into this!
traciehowe - Oh thank you, Laura! I’m glad you found it useful. It wouldn’t have been quite so good without the contributors, like yourself. :)
Mar Pages - Thank you for these tips! Simple but makes a world of difference. I actually do think the iPhone camera is fantastic, the time lapse feature does the job SO well for me!
traciehowe - You’re welcome! That’s great that you use the Time Lapse tool. Despite my best advice, I always forget to use it!
Lauren - Camera phones are getting better and better – I have the Samsung Note 5 and I’m continually impressed by the quality of photos it takes! Of course, I’d love to always have my DSLR on me, but I always have my phone with me so sometimes it works well because it’s on me all the time :)
traciehowe - They sure are! It’s kind of amazing what camera phones can do. I would love to get my hands on some other phones like the Samsung Note 5, just to see what it’s like compared to the iPhone. Thanks, Lauren!
Karla (Karla Around The World) - These are definitely great pictures! I love taking photos with my phone camera too most especially when I am too lazy to bring out my DSLR.
traciehowe - Thank you, Karla! I need to love taking phone pictures more. I think I may have inspired myself to do so with my own post! Haha! Sometimes you learn more when you teach. :)
Isabela - Thanks for sharing this, Tracie! This is such a very helpful article, especially when we forget our (big & bulky) cameras at home and we resort to our handy phones.
traciehowe - You’re welcome Isabela! Based on some of the comments, I wonder if it’s more helpful for those of us who DO have big bulky cameras that we can’t bring with us since we may not be as used to using our phones! ;)
Stacey Valle - Such a wonderful tips!
I’m also not really a fan of phone photography, but they do get in handy sometimes when I cannot carry my DSLR as well. I mean, it’s better to have photos than nothing at all, right?
I don’t have iPhone but a samsung galaxy. It’s alright at some ways, but after reading this post, I should explore it more and keep this tips in mind when I borrow my friend’s iPhone to take photos sometimes too haha
good post! sharing this! :)
traciehowe - Hi Stacey, thanks for sharing this! Yes, I am not as much of a fan of phone photography either, but I agree that it’s better than nothing! I think we DSLR users are a bit spoiled, so we can really see the differences. ;)
traciehowe - PS: I just noticed your link to a Cajun Encounters Honey Islands swamp tour! I did that last year. Pretty fun, wasn’t it? :)
Trisha Velarmino - P.S. I'm On My Way - Thanks for all the tips, Tracie! I’ve been having trouble maximizing my phone camera’s potential to take quality photographs and I usually have a hard time understanding photography jargon so this post is really helpful! And oh, I am really into the panorama mode too! Great shots!
traciehowe - Great, Trisha! Glad to help!
Wilson Amplifiers - These are great tips. Also, love the shots!