
Welcome back to this series of non-technical photo tips for travelers… and really anyone else.
This time I’ll be covering point and shoot cameras (also known as compact cameras), which are those cameras that fall somewhere between a camera phone and a DSLR. They’re small, relatively easy to use, and usually on the cheaper end of the photography gear scale. I say “relatively easy” because I actually think having too much automation and just a few buttons that have more than one function can make things more complicated. That’s just based on my own experience with the few point and shoot cameras that I’ve owned. Some point and shoot cameras will come with manual capabilities too, but in this post I will refer to those that do not.
Since I rarely use point and shoot cameras anymore, I won’t have a lot of decent photos to demonstrate many points in this post. I have a point and shoot that I used to use mostly for underwater photography or in potentially wet conditions, but it’s pretty old. I now use my GoPro for underwater, but I prefer my DSLR for almost everything else because it gives me full control, while my iPhone is next in line for quality and convenience. I also just got a drone, but that’s a whole other story. ;)
I did start out with a point and shoot though, and I have that old little camera to thank for forcing me to take photography more seriously. At a certain point I knew my limitations for taking photos with it, and I wanted to do more. If you’re at this point, you might consider upgrading to a DSLR. I cover that more in the next post of this series.
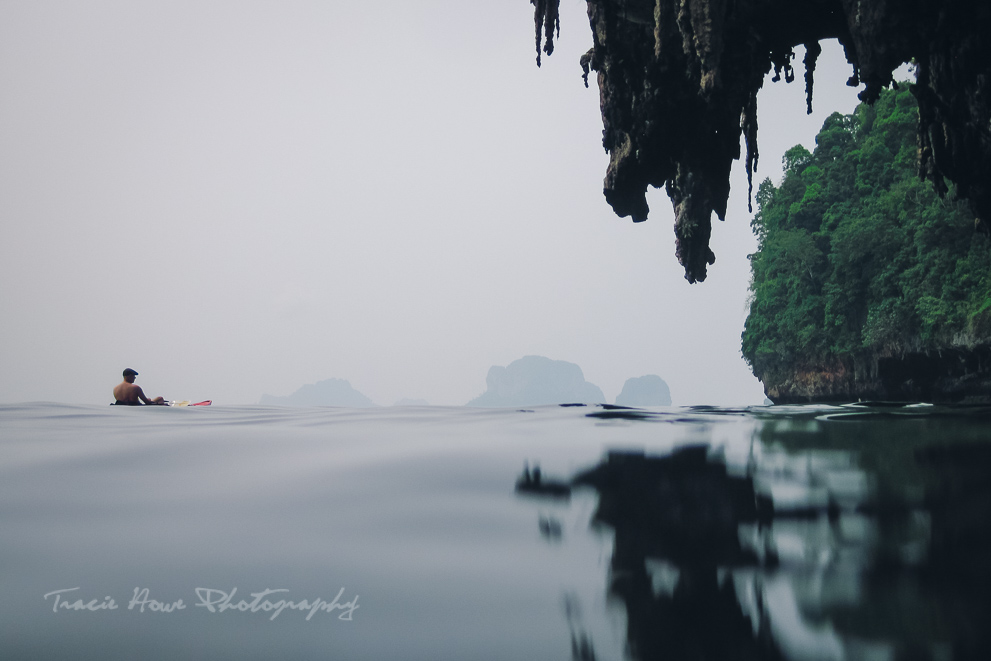
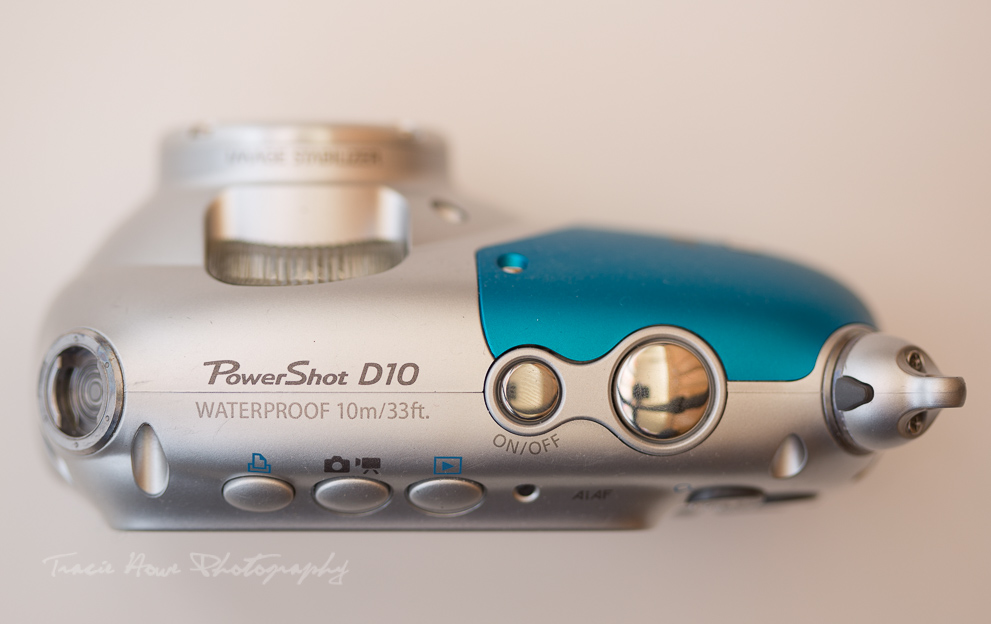
On a hazy day in Krabi, I positioned my waterproof Powershot D10 at the water’s surface for a unique perspective of Dave kayaking.
With that said, there is still a lot you can do with a point and shoot. There are some things you can take control of, and of course there are always those fundamentals of photography that I covered in the series introduction post. If you haven’t read that yet, I suggest doing so before continuing.
Where to start with your point and shoot
Read the manual – The very first thing that you should do is refer to the manual. Don’t have a manual? You can probably find it easily online. I don’t suggest reading it front to back, but having it as a reference for how to change settings will save you a lot of headaches. All cameras will be different, so I can’t tell you how to navigate your menu and settings. You have to be able to do that for yourself. Just keep it nearby as you continue reading. ;)
Reset to default – If you know you’re guilty of playing around with menu settings and changing things when you don’t know what you’ve changed, it might be a good idea to start from scratch. It’s possible that you’ve turned something off that needs to be on in order for certain functions to work.
Turn off Auto – If you’ve always got your camera set to Auto, this is your chance to try something new. Auto is FULL auto, where the camera is really just guessing what you want it to do. Your camera likely has other automatic shooting modes as well, but these give you a tad more control as I will discuss below.
Turn off the flash – Now that you’ve turned off Auto, turn off that flash too. You’ve probably already ruined plenty of photos because of that awful flash, right? Just turn it off. Cameras will usually have an auto flash option as well, but I find that this still fires when I don’t want it to, so you might as well leave it off. Just try to remember how to turn it off so you can turn it back on again when you actually DO need it. Your photos can be so much better with the flash off, though sometimes you will need that extra light. Just be sure that you’re the one to control of when it happens.

Turn off Digital Zoom – Unless you have no way of editing your photos (even cropping) later, then you have no use for digital zoom. It will only make your photos look worse because you’re just magnifying pixels. Your best bet is to walk closer to your subject or use your Optical zoom if you have one. The Optical zoom is making use of the mechanics of the camera instead of cropping in to existing pixels.
Turn off Digital Zoom - Unless you have no way of editing your photos (even cropping) later, then you have no use for digital zoom. It will only make your photos look worse because you're just magnifying pixels. Click To Tweet
RAW or Jpeg – You may have the option to change your image recording quality to RAW. If you do, I highly recommend it! RAW will give you the highest quality and the most flexibility when editing. I do have to warn you that you need special editing software to process and convert RAW files, but don’t let that scare you. There are plenty of RAW editing programs out there! I talk more about some of those in this editing post of the series. RAW images take up more room on your memory card and take slightly longer to record, so just be aware of that before you start firing away.
If you have no choice but to set your camera to shoot Jpegs, then just be sure to set the size of those Jpegs to the largest possible dimensions. You’ll also want to be sure that the quality of the Jpeg is “fine”.
Semi-auto shooting modes
To ease you into using your point and shoot more effectively, let’s continue with semi-automatic modes. As I mentioned earlier, these kinds of auto modes will give you some control. You’re essentially telling the camera what kind of scene you’re shooting so that it can better guess what to do. In my experience, these modes are still very limiting.
After choosing the best settings for your chosen scenario, you may be able to change some additional settings within each mode. Just remember that having all that automation comes with the cost of not being able to change some other things. This may also vary a little from camera to camera or brand to brand, but you should test each one out to see what works for yours.
Here I have a list of common shooting modes, their intended uses (not always what you would think) and their typical icons. The camera changes its settings based on the mode AND what it senses the conditions to be. For example, the settings that the camera chooses on Portrait mode inside a dark room might differ from Portrait mode outside on a bright day.
- Portrait mode (a person’s face up close) – This one is of course intended for photos of people. On my little point and shoot, Portrait mode “produces a soft effect” according to the manual. This basically reduces contrast and sharpness on the skin. I personally think that’s a bit gimmicky, just like some of these other modes.
- Landscape mode (a mountain or outdoor scene) – This usually means that colors are made to be more vivid. Maybe your camera also changes the aperture to be smaller (a larger number), which is ideal for most landscapes, but my point and shoot camera doesn’t seem to do that. The flash appears to automatically stay off in this setting.
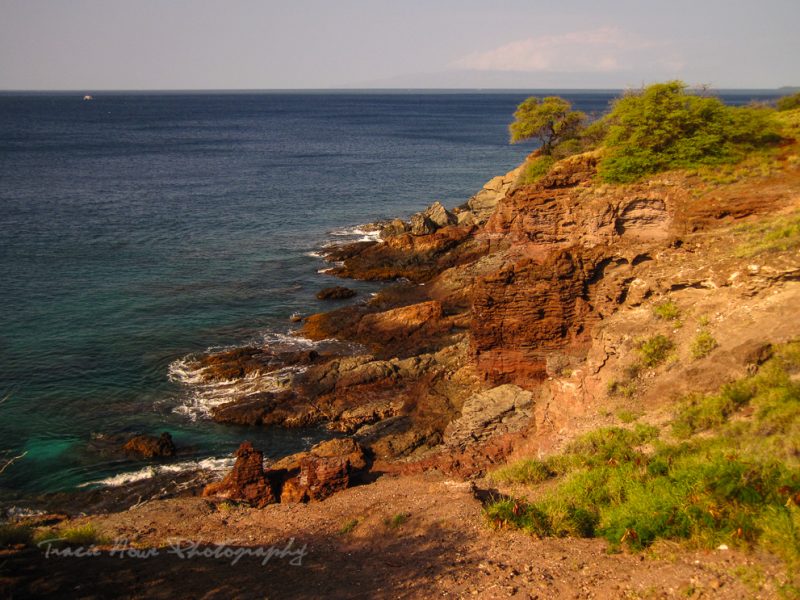
The landscape in this photo was so saturated with color that I barely edited it afterwards, except to straighten the horizon. Again, I prefer to control my own settings instead of letting the camera choose to oversaturate my landscape photos.
- Indoors mode (a symbol for a party) – If this mode is used indoors, the flash will most likely be enabled. Mine turns off automatically if there is plenty of light. The intention here is to provide enough light and capture any action that may happen indoors, such as at a party. My manual also says that the light should look more natural, which probably means that the white balance is set to match that of typical indoor lighting.
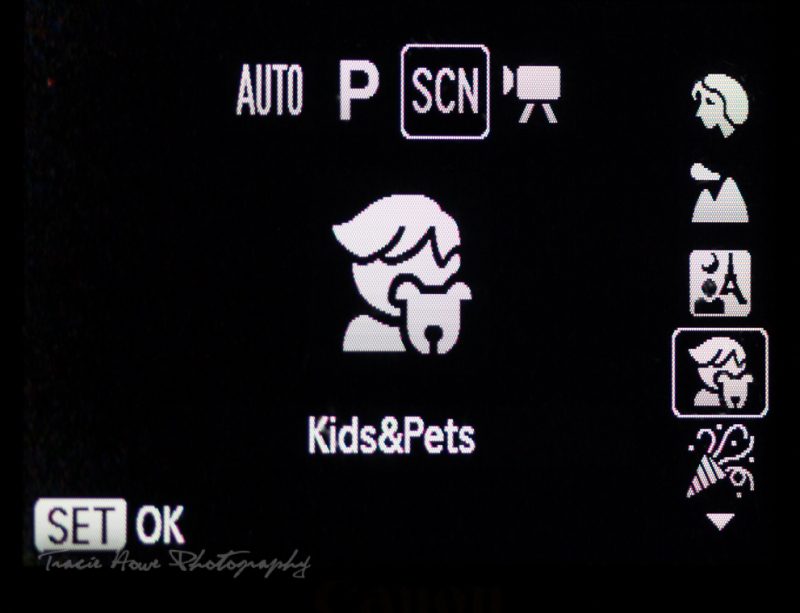
- Pets & Kids (a pet and/or a kid) – I think this also may be Sports mode on some cameras. It’s for fast action, indoors or out. Flash will be enabled if it’s dark enough.
- Night mode (stars and/or a moon) – This mode is intended for use at night on a tripod. The shutter speed is longer, allowing existing light in for longer. This means your camera has to be stable. There is no flash, because you can’t light up an entire night scene with a flash.
- Night portrait (a person in front of a night scene) – This mode is similar to the previous one except it uses flash to freeze a subject that is standing in front of the night scene. Because you can light up a person if they are standing close enough. ;)
- Daytime (a sun or sunny day scene) – This mode is intended for very bright scenes. It may reduce the amount of light entering the camera because it’s so bright.
- Sunset (a sunset) – This mode will make your sunset colors more vivid. It will also automatically turn off the flash because a flash won’t do a thing for a sunset scene, unless there is a person in front of it. Even so, your little flash probably can’t overpower the sun.
- Underwater (a fish) – This mode is obviously intended for underwater photography. In this mode, my camera will usually have the flash set to on, but it will change if it senses enough light. The intention of this mode is to capture movement in darkish scenes. I often use something else for underwater photography, again because I like to control the settings myself as much as possible.
I recommend using these different shooting modes to give you a better understanding of what settings change based on certain conditions, so you can apply that knowledge to your ever expanding array of mad photography skillz. Using the playback feature with all the settings information listed will help you optimize your own shooting. Under “normal” conditions, you’ll probably see more or less the same settings that the camera chooses, but when conditions become more challenging, you’ll see what the camera changes to adjust for those.
I recommend using these different shooting modes to give you a better understanding of what settings change based on certain conditions, so you can apply that knowledge to your ever expanding array of mad photography skillz. Click To Tweet
P is preferable for some control
You may not be able to adjust all settings if you are in one of the auto modes listed above. Moving out of those shooting modes, P might be the next best mode for you if you can’t use all manual settings. Even DSLR owners who are not familiar with all of their camera’s functions will use P mode in place of auto. My dad jokes that “P is for professional”. That’s because he thinks it does the best job possible, next to changing all the settings himself.
Below are some of the extra functions that can generally be changed on cameras, sometimes in your auto modes, but mostly in P mode:
ISO – I will discuss ISO more in my upcoming DSLR post, but here’s the quick and dirty explanation… A higher ISO allows you to shoot in lower light when all else fails. The only disadvantage of using a higher ISO is that the quality of the photo will be diminished due to graininess and noise. So just be aware of that before you bump up your ISO to the highest setting at all times! It’s not always what you want.
White Balance (or WB) – Again, here is a quick and dirty version of a WB explanation. All light has color, and every lighting condition will produce a different result on camera because of its color. Changing the WB is a way to tell your camera that you’re shooting under a certain kind of light. For example daylight vs. fluorescent light. Play around with these settings in extremely different lighting scenarios and you’ll see a huge difference. You may also have the option to set a custom white balance, which could give you the best results. Follow instructions in your camera’s manual to do this.
Color settings – This is different from White Balance. It’s more like you’re telling the camera what color effects you want in the photo, rather than what color the light is. The options here can vary from extra vivid colors to black and white conversion. If you want certain color effects, I always suggest leaving this option off and editing the photo how you want it later. This means that you won’t lose the “original” photo to some unfortunate decision that you made at the time of shooting. You can’t change black and white to color later, but you can change color to black and white later.
Drive mode (Continuous shooting and single shot mode) – I always recommend continuous shooting over single shooting mode. This just means that there is no unnecessary pause in between shots. If you’re shooting any action, this is the way to go. You may even be able to hold the shutter button down without letting go. Just keep in mind that after several shots like this, your camera may still need to pause to catch up and recover after so much work, so don’t push it to the limit.
Metering
Metering is how your camera measures the amount of light coming in for “the right exposure”. What is right to the camera may not be what is right for you. For example, if you are taking a photo of a small subject in front of a very bright scene (this means your subject is backlit), your camera will read all that light and probably assume you want it a little darker. However, if you want to capture a silhouette, you’ll need to darken down the scene A LOT more than what the camera thinks. If you can’t manually control this, you might try to use your metering settings to try and trick the camera into guessing for a better exposure. Metering options are as follows:
Center weighted average – Where the the overall scene of brights and darks are averaged together, but the camera gives the center more weight. In other words, the center has the most power here. Mwahaha!!
Evaluative – This mode takes all of the light and dark information in the scene and makes it’s best guess as to the proper exposure when metering.
Spot metering – The spot in the center is the only thing that is metered in this mode.
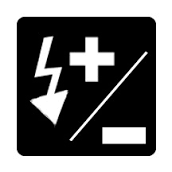
Exposure compensation – To manually control your exposure without getting into full manual nitty gritty that will come in the next post, you probably have some sort of exposure compensation button. It may have a plus and minus sign which allows you to make the exposure brighter (+) or darker (-). Easy peasy!
Lock exposure – This one may depend on your camera, but some point and shoots will allow you to keep the exposure the same while you focus, compose, and shoot. This is usually called AE (Auto Exposure) Lock. You may also be able to change the exposure and then lock it.
Focusing options
There are a surprising number of focusing options available on point and shoots, even those with built in lenses. Here are some that you can play with.
Macro focus function – This allows you to focus very close up. If your camera is in another focusing mode, you may find that it will refuse to focus on anything super close to the lens.
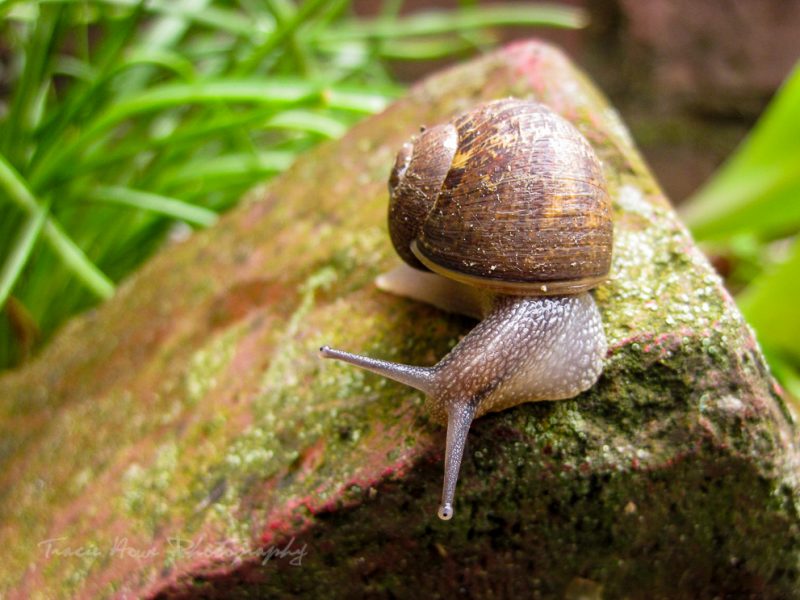
This is as close as I could focus WITH the Macro setting turned on.
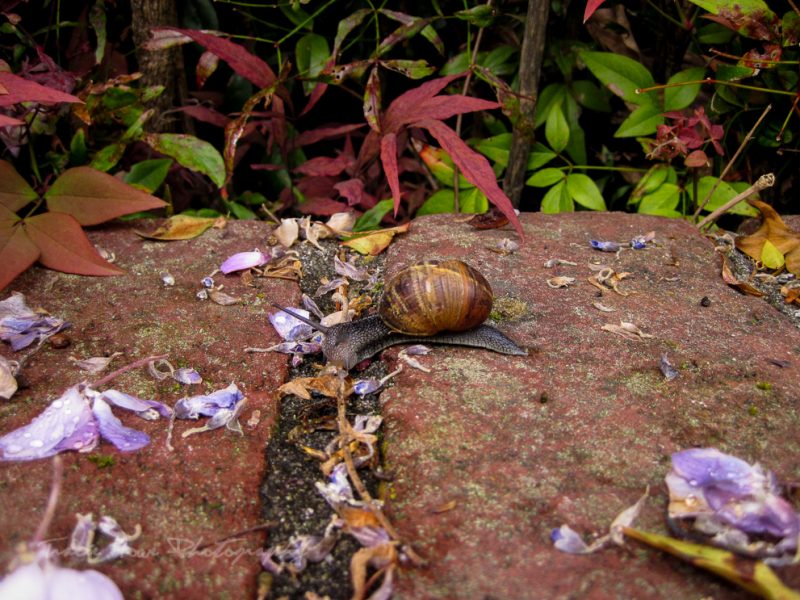
This is the closest I could focus on the snail WITHOUT the Macro setting.
Infinity focus mode – This is intended for the most possible focus, from the closest point to the farthest point in your scene. This is best used for something like landscapes, where you want everything sharp throughout the entire photo.
Normal focusing mode – This is the standard focus mode. It’s a safe one to keep your camera set to when you aren’t playing with the other options.
Manual focusing mode – I was actually surprised to see that my little point and shoot has manual focusing capabilities! Apparently you can digitally manually focus through the LCD screen. I had no idea! Just be aware that while this allows for some great creativity, you’ll probably want to use this mode on a tripod. Otherwise you might move enough to throw off the focus that you’ve set. Look in your camera’s manual to see how to set this.
Locking focus – Locking your focus allows you to recompose without throwing off your focus. Usually pressing the shutter half way will focus the lens. To lock the focus, just hold your finger there until you recompose and take your shot. Again, you may need to refer to your manual.
Other options
Your camera will have many more functions that what I discuss here. A lot of the more useful and common functions have been added to mobile phone cameras. Instead of repeating those here, please visit my post on the subject here. You’ll find self-timers, panoramic modes, face recognition, and many other things to play with, but it all depends on your camera. If you have any questions about something I haven’t covered here, please feel free to ask!
There is one feature that I haven’t covered here which any and all digital cameras will have – the playback. You should be able to display different kinds of information overlaid on a photo you’ve taken. It’s one of the most important tools at your disposal when learning photography, because it will help you understand what worked or didn’t work for that particular photo.
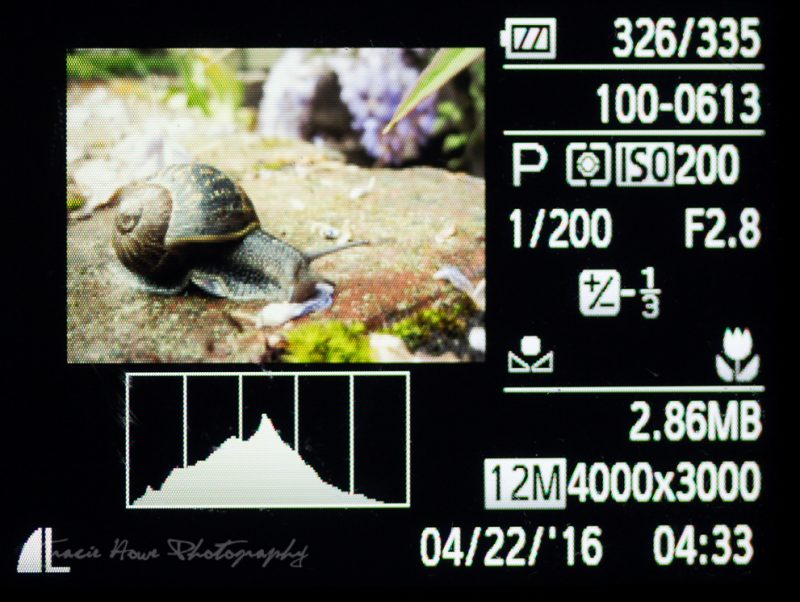
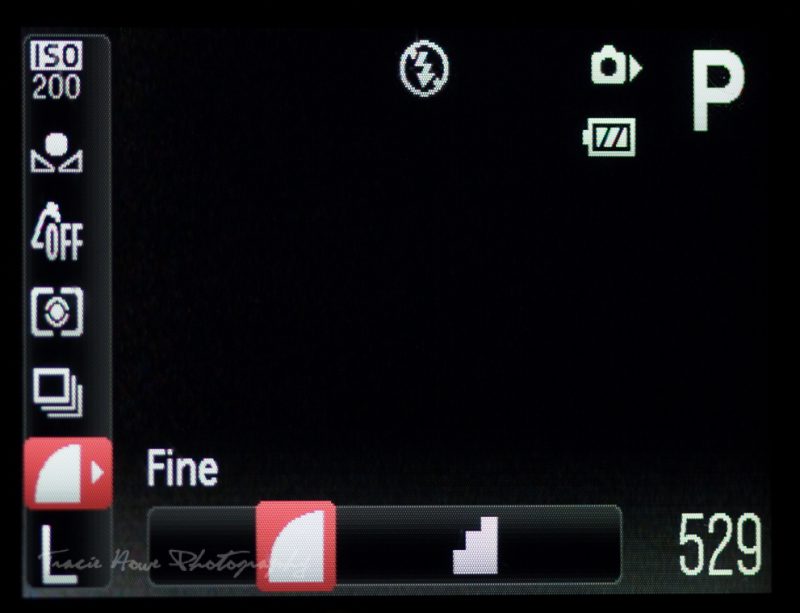
By viewing my settings you can see that I chose to underexpose by 1/3 of a stop (-1/3) and used the Macro setting to focus closely on the snail. The mountain shaped histogram shows that there is a good, even exposure. I also used a custom white balance for this photo.
It’s complicated
When I began writing this post, I was surprised to learn how much my little point and shoot could actually do. Just delving deeper into the manual showed me more options than I knew existed. That’s probably why it took me so long to get this post done! When a camera is super simplified with so many automated functions, it actually becomes overcomplicated. At least, I think so! While using full manual settings may be intimidating to a beginner, once you understand them, you may find that it’s a lot easier that navigating through a multitude of automatic options. And if you’re on the fence about buying a point and shoot or a DSLR, remember that some compact cameras also have manual functionality.
Don’t be afraid to take full control of your photography destiny! Subscribe to be notified of the next post in this series, which will give you the knowledge you need to embrace photography at it’s best – with a DSLR camera! :D
Happy shooting and don’t forget to continue with the series. You can also subscribe to get updates delivered to your inbox!
Find each post from the series below:
Introduction – Non-technical Tips for Any Camera
Part 2 – Point and Shoot Cameras
Part 3 – Intro to DSLR Cameras
Part 5 – Desktop and Mobile Editing


Voyager - Liked your post a lot, it packs in a lot of information and tips for Point and shoot cameras, which is indeed very useful. But yes one reaches a stage where you have done the maximum with the Point and shoot and exhausted all its capabilities and now you need more control :)
traciehowe - Thank you for the comment, Voyager!
Tami - Lots of detailed and valuable information here. I am one who still uses a point and shoot or my cell phone camera. But I’ve been pretty happy with most of my photos. Still, I appreciate the moments I just spent reading your post and considering that I do have other options!
traciehowe - Thanks Tami! Well, the post is always here for your reference if you need it. :)
Christina - A great primer on point and shoot cameras. Although just like you, our DSLR is our go to camera, we have also kept our point and shoot for underwater photography.
traciehowe - Thanks for your comment, Christina. Those underwater housings for DSLRs are pricey and probably way too cumbersome to swim around with… at least how I swim. Better to use a point and shoot made for that if it’s not your primary subject of photography.
Mar Pages - Although I usually love the quality of a DSLR, sometimes lugging it around can be a hassle. Now I know how to fully utilise a point and shoot, thank you!
traciehowe - You’re welcome, Mar! I hope it helps you when you need it.
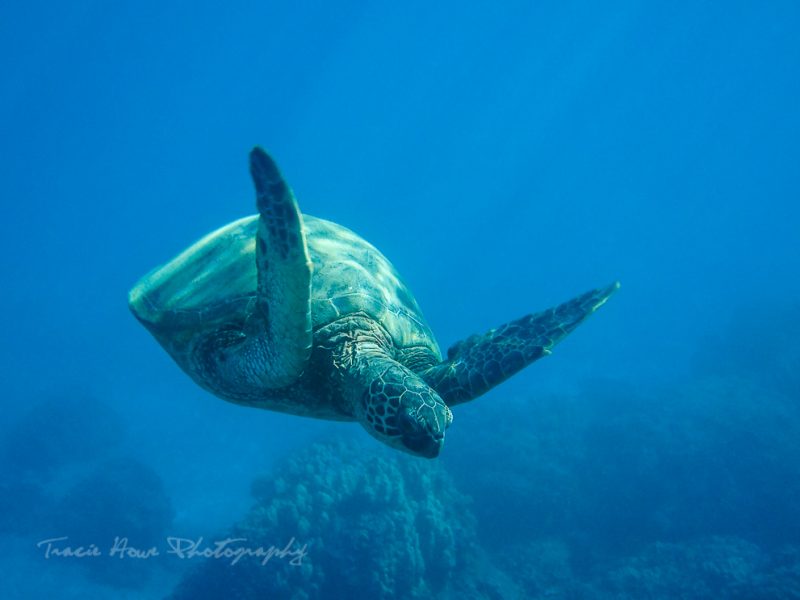
Doreen Pendgracs - I love your photos, Tracie. The one of the turtle, and the shots of the snail are excellent. I am good at composition, but poor on the technical side of things. I should probably take a course and then maybe I’ll start to use my DSLR again. Right now, it’s the iPhone all the way.
traciehowe - Thanks, Doreen! I also love that turtle shot, but that’s mostly because I really enjoyed that moment. The photo was a bonus though! Maybe my DSLR post coming up will help you if you’re looking into using one again.
Christina Guan - Nice post! I haven’t used a point and shoot in years but I wish I had this guide back when I used one haha. I remember there being so many confusing buttons, and my photos always turned out like garbage! Pretty happy I’ve upgraded to a DSLR now haha, but I’m really impressed by the quality of your point and shoot photos.
traciehowe - Thanks, Christina! That’s exactly how I felt when I used my first point and shoot! It’s still rough going in my opinion, so I agree that DSLRs are the best!
Elizabeth @ Compass & Fork - I use a DSLR but have a point and shoot. It is convenient when you don;t want to (or it may not be advisable) to take the big camera. I don;t use it as much anymore since my phone camera is pretty good, but the filters/settings on it are handy sometimes.
traciehowe - Thanks for your comment, Elizabeth. It’s definitely inconvenient to carry around a DSLR for all situations, so I know what you mean. Phone cameras are often comparable or even better than point and shoots these days, so I rarely use mine either.