* Click here to read Part 1 first! *
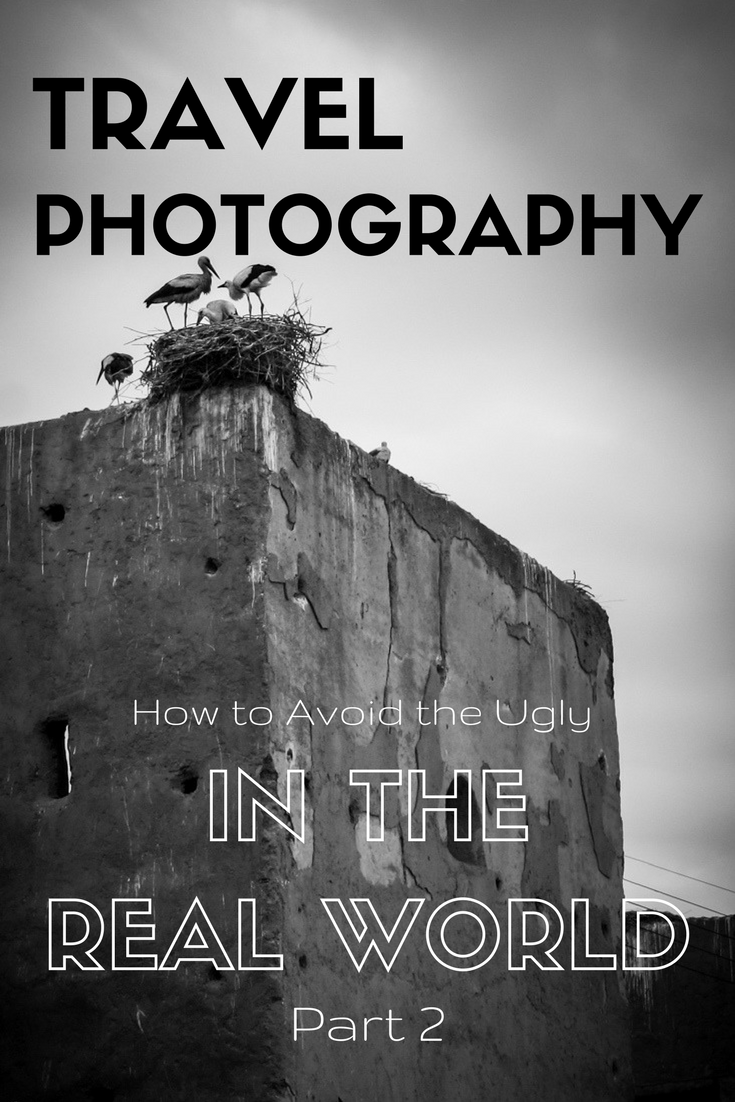
Part 2:
As discussed in part 1, intent and planning play an important role in travel and travel photography. In order to avoid those ugly eyesores in the real world of travel, you should be doing your research ahead of time. But even when you do your best to plan in advance, sometimes the ugliness is still there. Part 2 delves deeper into specific strategies that should help you take great photos, despite the obstacles that pop up during your travels.
Timing is everything
All that research you did beforehand can be applied to choosing the best time for photos. Factors like good light, crowds, and access will influence how you manage your timing from the dates of your trip to the hours in each the day.
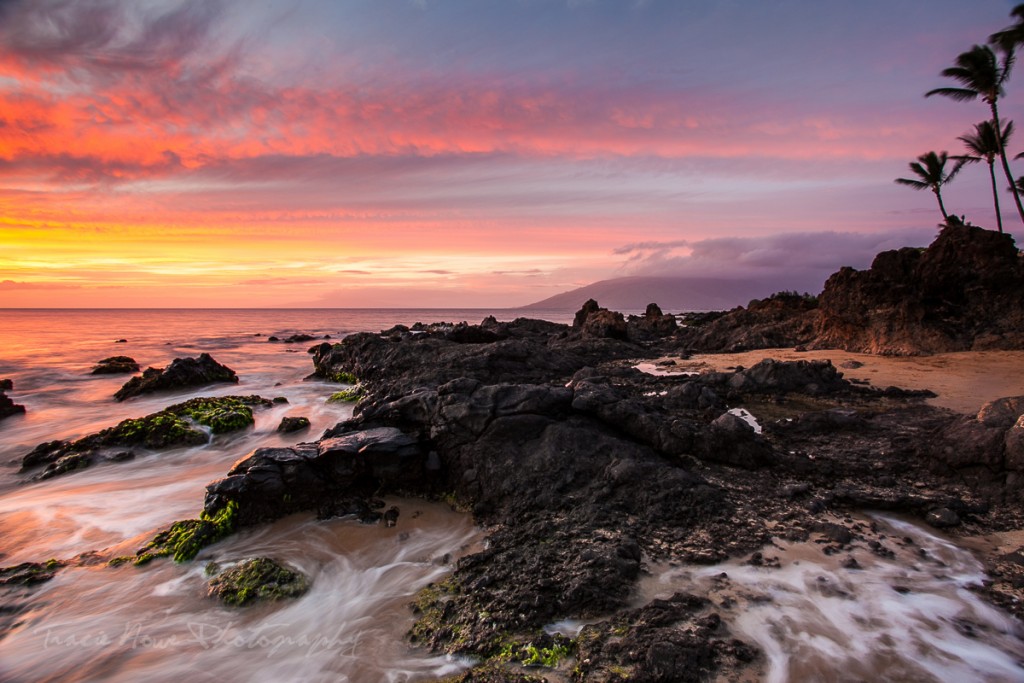
Choosing the right time of day for capturing your photos will really make a difference in the quality of your work. Shooting at mid-day will typically leave you with dark shadows and bright highlights, making it more difficult to set a proper exposure. There is no hard and fast rule that photos can’t be taken at noon, but it is usually best to skip the high, harsh light of mid-day if you can. Generally photographers will favor the hours around sunrise and sunset for softer light and richer colors.
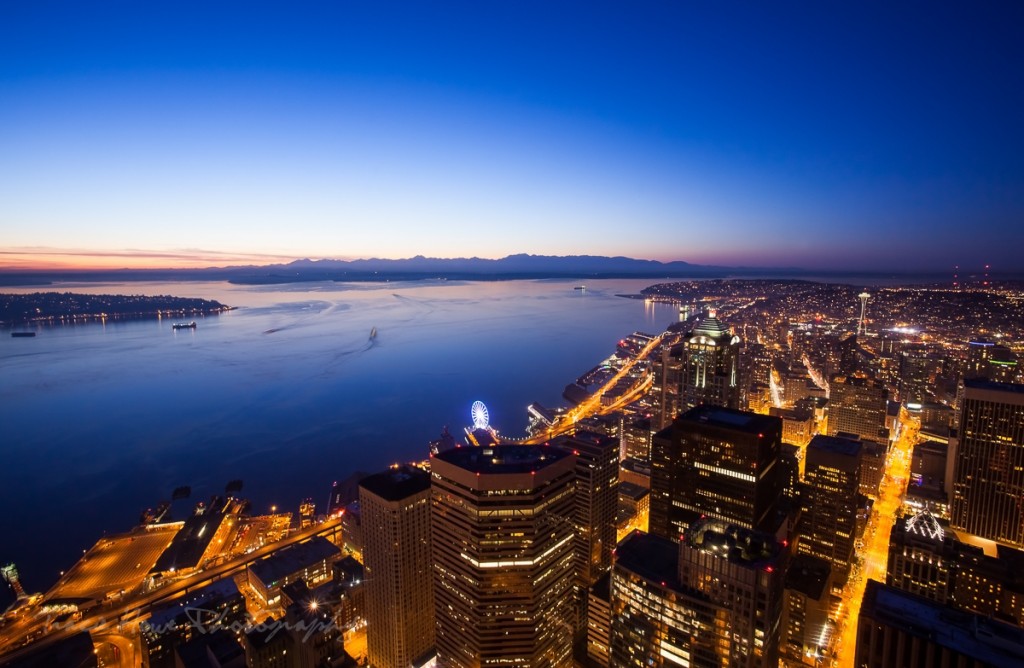
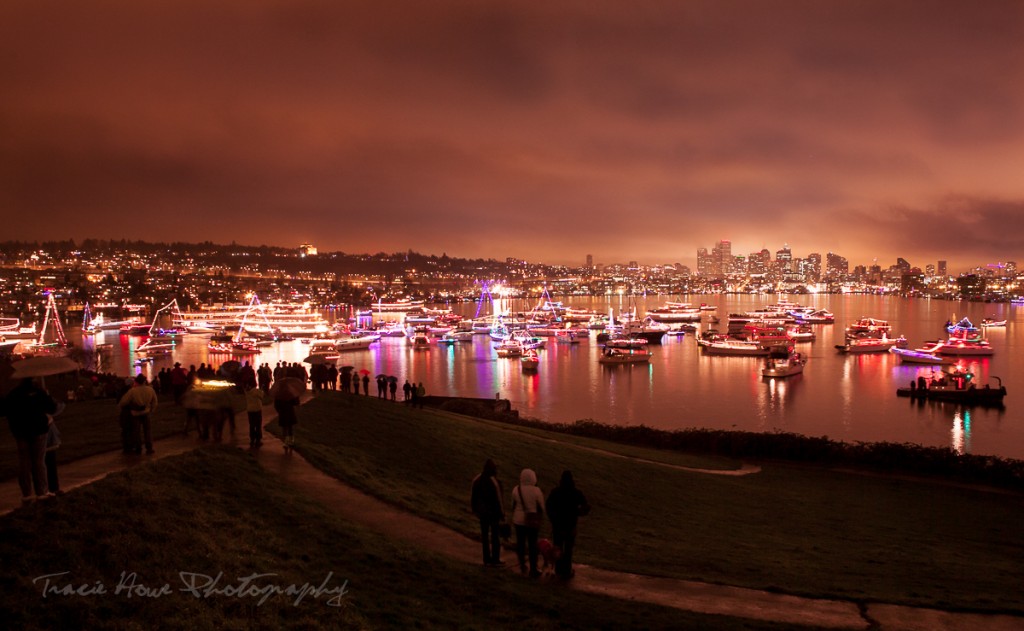
Often a place of interest will be touted as best for either sunrise or sunset. While I encourage you to be there during the suggested time, I also recommend staying late and going early. A place I know well for sunset is Seattle’s Kerry Park. I have photographed the sunset there countless times, but it can be hard to get “the spot” unless I arrive before the other photographers. I always stay until after the sun has gone down. Most amateur photographers pack up right after sunset and completely miss the lovely blue hour that follows. The same goes for sunrise. Arrive well before anyone else and capture the growing light just before sunrise. I also suggest trying the opposite of what is recommended as it may be just as beautiful.
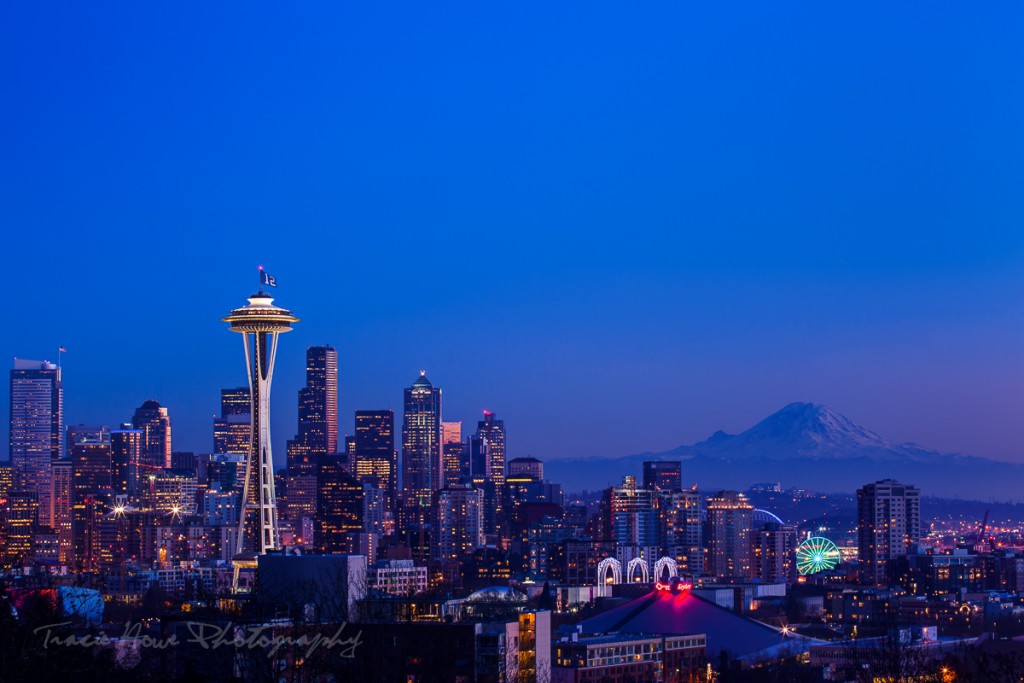
Seattle’s Kerry Park after sunset, when many people have already left.
If the best light of the day is not an option, or if there are other obstacles like crowds to consider, this is when all that advance research should come in handy. Consider visiting a destination during low season to save yourself a lot of crowd-fighting headaches. Even in low tourist season, you may still run into throngs of people at certain times of the day. Companies providing highlight bus tours will stop at a place, dump out camera toting passengers, and reload them 20 minutes later for the next viewpoint. Knowing when the tours come through is very helpful, but I believe the biggest culprit to sudden tourist surges is cruise ships. As a former cruise ship employee, I can tell you that one cruise ship in port can easily triple the population of a small town for the day, and that is something you will want to miss. Cruise ships are often the reason for multiple bus tours as well, so make sure you go when they are not in port.
Sometimes you just have to turn to the experts. It’s possible that a place simply isn’t accessible during certain times of the day, or even at all without the right person. In these cases sometimes you can find private guides or small tours (photo specific tours are the best!) that can provide you entry at the best times for avoiding crowds and getting the best light for your photos.
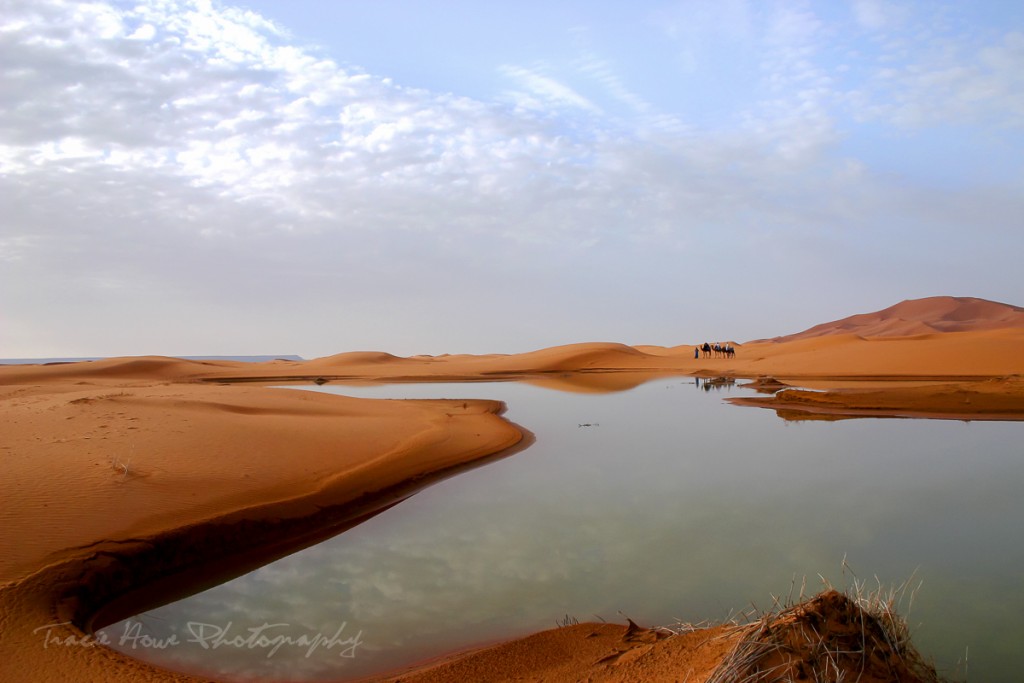
Taken during a private sunrise camel tour into the Sahara Desert.
Find your spot
Much of the difficulty in photographing iconic places is trying to find the best spot to avoid any people, trash, construction, fences, or countless other obstacles that may present themselves. Sometimes all the planning in the world can’t beat just showing up and looking around, so make sure you give yourself time to do this.
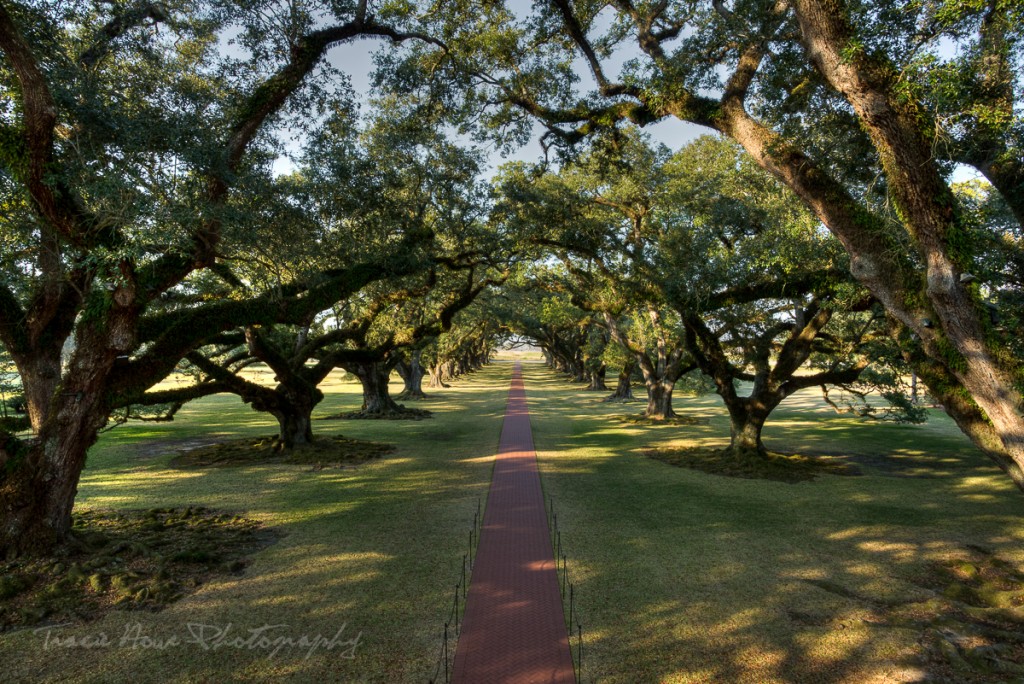
If the obvious spot right in front of that famous landmark is way too crowded, there may be no other option but to move. Instead of that wide, iconic symmetry you’ve been dreaming of, you may have to find a totally different idea or composition of the same place. Shoot from a different perspective – get up high and shoot down, shoot from low on the ground, or just look up. Sometimes simply turning around can be magical. Try shooting details instead of the bigger picture. This can help to tell a more complete story of a place anyway.
You may have to incorporate people into your shot if you can’t totally miss them. This can often give a sense of place better than a photo with no people. Whatever you decide, be sure to challenge yourself to capture an iconic landmark in a way that no one else has ever photographed it.
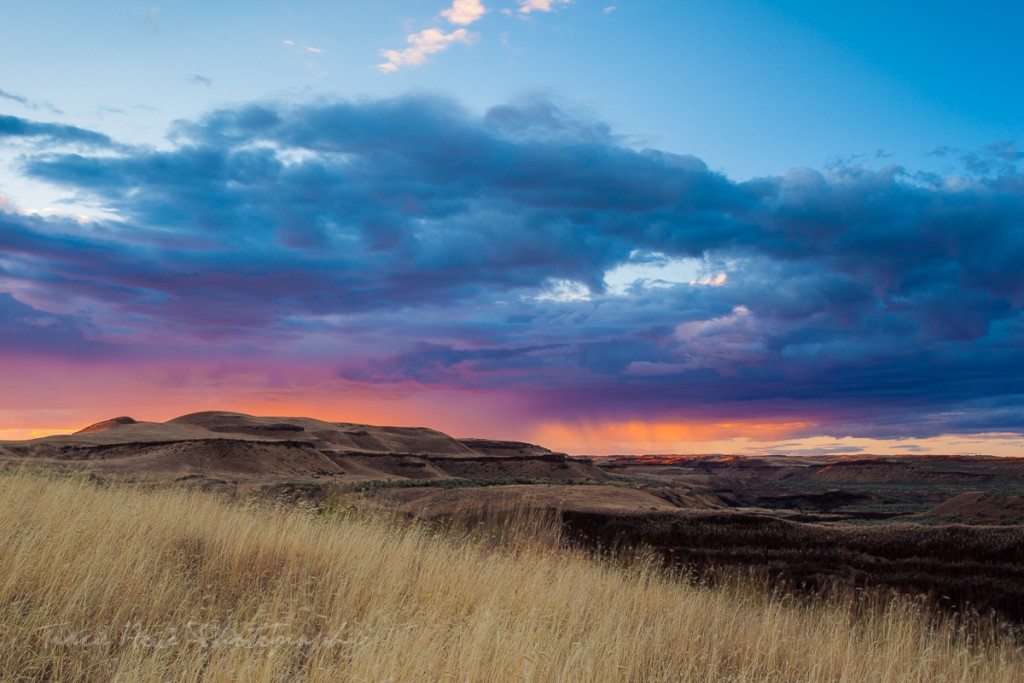
The idea was to photograph Palouse Falls at sunset, but I realized that the show was much more dramatic behind me.
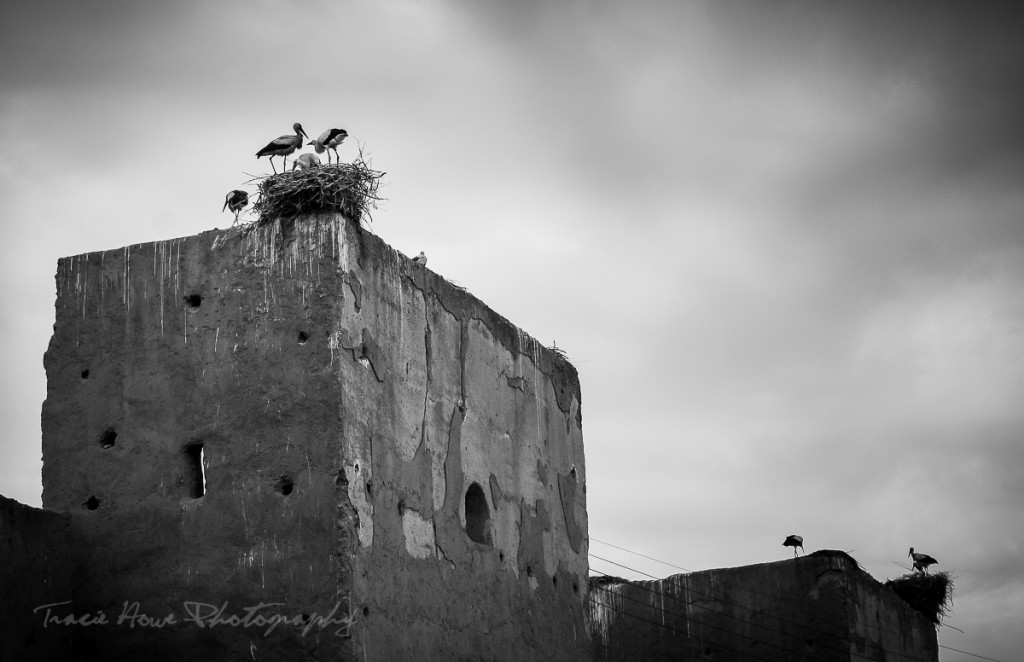
This historic ruin in Morocco has been photographed often, but this is a different take on the same place.
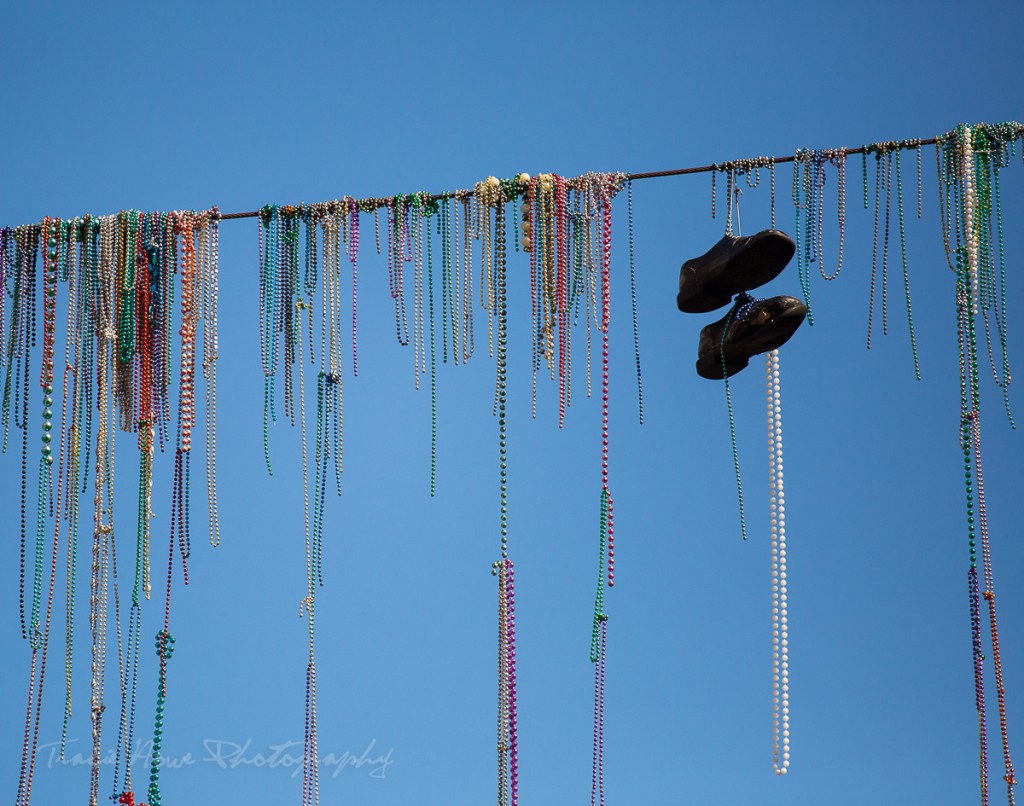
A telling detail from Bourbon street in New Orleans.
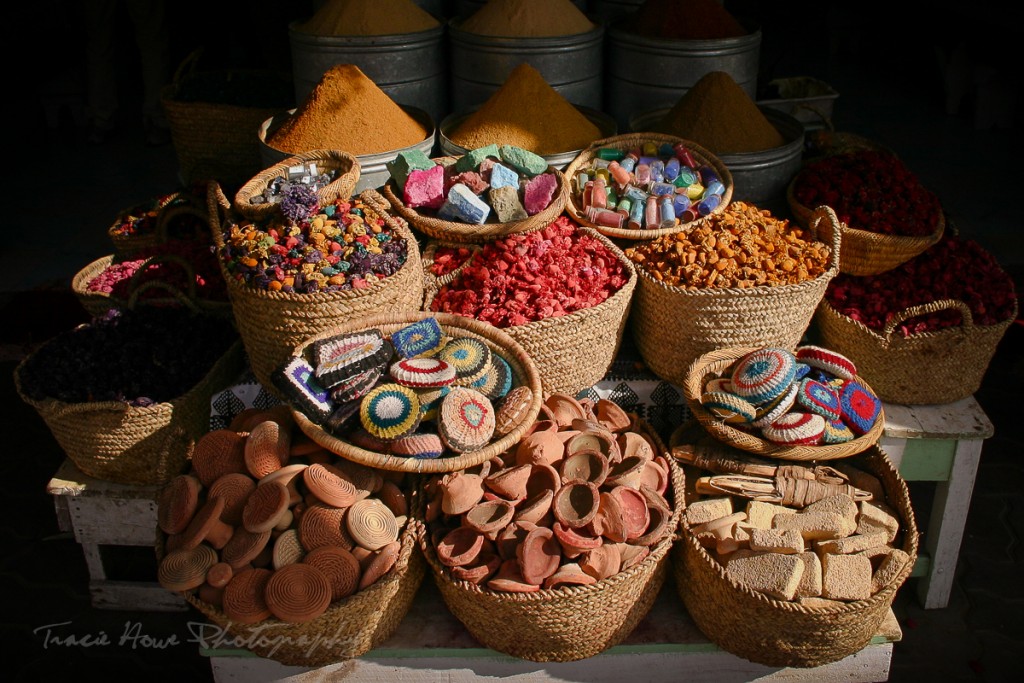
The busy markets in Marrakesh did not prevent me from capturing this detail.
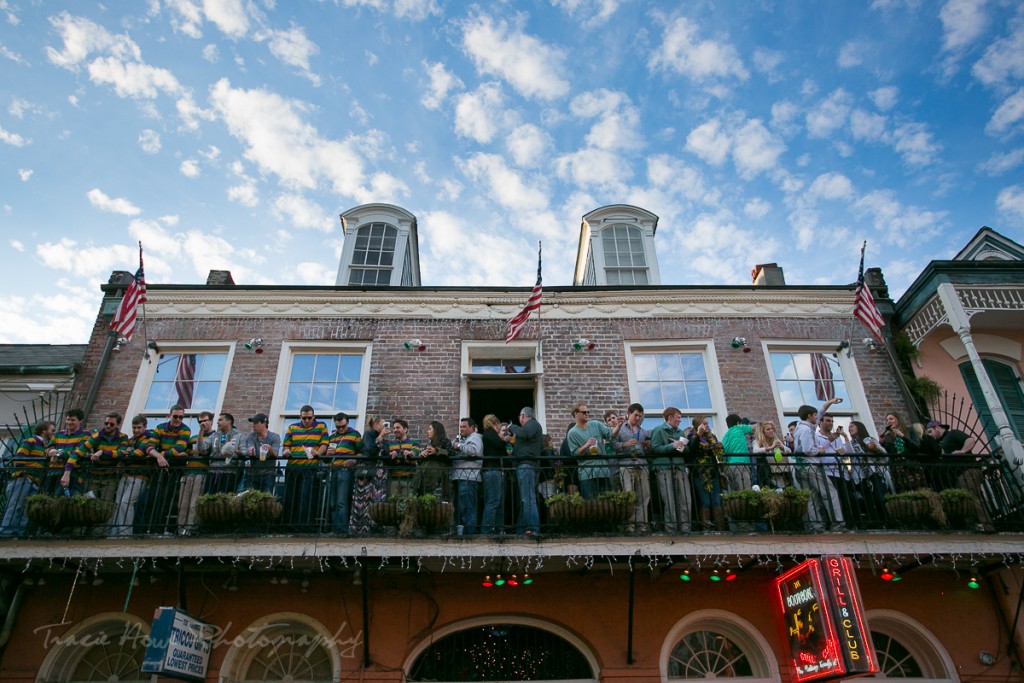
I couldn’t avoid all of the people on the streets of New Orleans, so I decided to incorporate them.
Don’t get stuck on one idea of how to capture a place. Explore! Go somewhere entirely different! This is the best part about traveling for me. I can tell you from experience that the popular spots are not always the best ones for photos. During my cruise ship days, I was delivered to the world’s most beautiful destinations where swarms of tourists took their photos. But the best parts of those destinations were rarely where all the tourists gathered.
Just a head’s up that when you visit Seattle, you should try Columbia Tower’s Skyview Observatory instead of the top of the Space Needle. You’re welcome. ;)
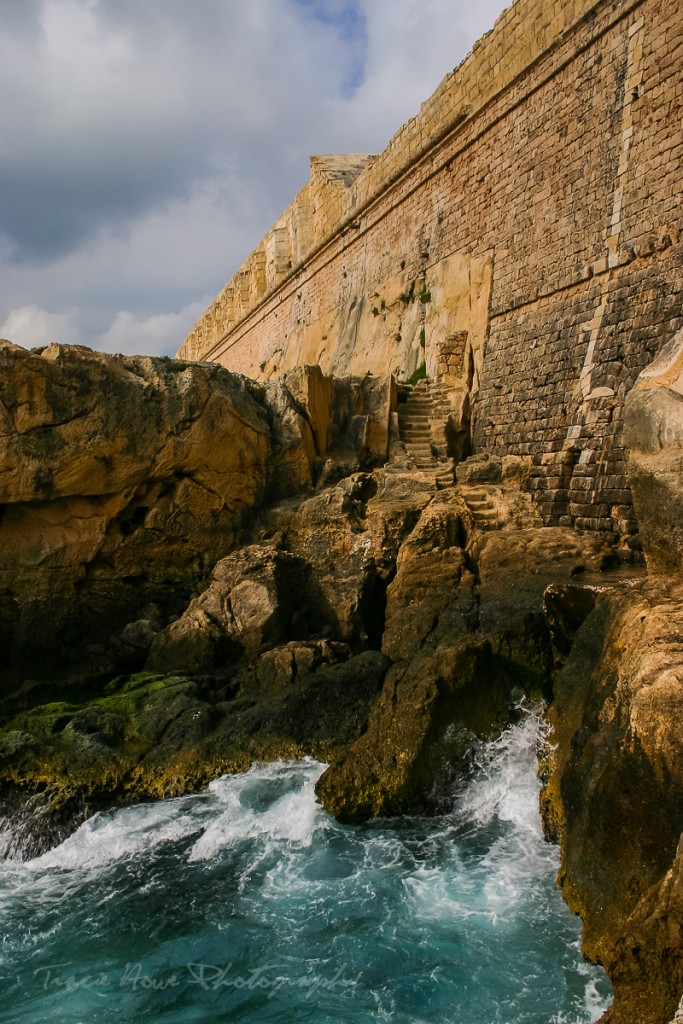
Found while exploring Valletta, Malta. Sometimes the coolest places are not well known.
The best view of Seattle, in my opinion. Also, this was taken after sunset and shot through glass. :)
The right tools
Often your choice of gear can be the key to achieving the results you’re after.
- Lenses – A long lens can zoom past garbage and over people’s heads, essentially cutting out the clutter surrounding your preferred subject. Shooting through something like a fence with a low aperture lens (like f2.8 or less) can blur the foreground to the point of not being visible. You can also blur a cluttered background in a similar way, making it less distracting. Sometimes a blurred background or foreground will create an abstract shape that can be used to partially frame your subject. Good lenses have a huge range of creative possibilities that can be fun to play with! This could be an entire topic of it’s own, so I may revisit this subject in a future post.
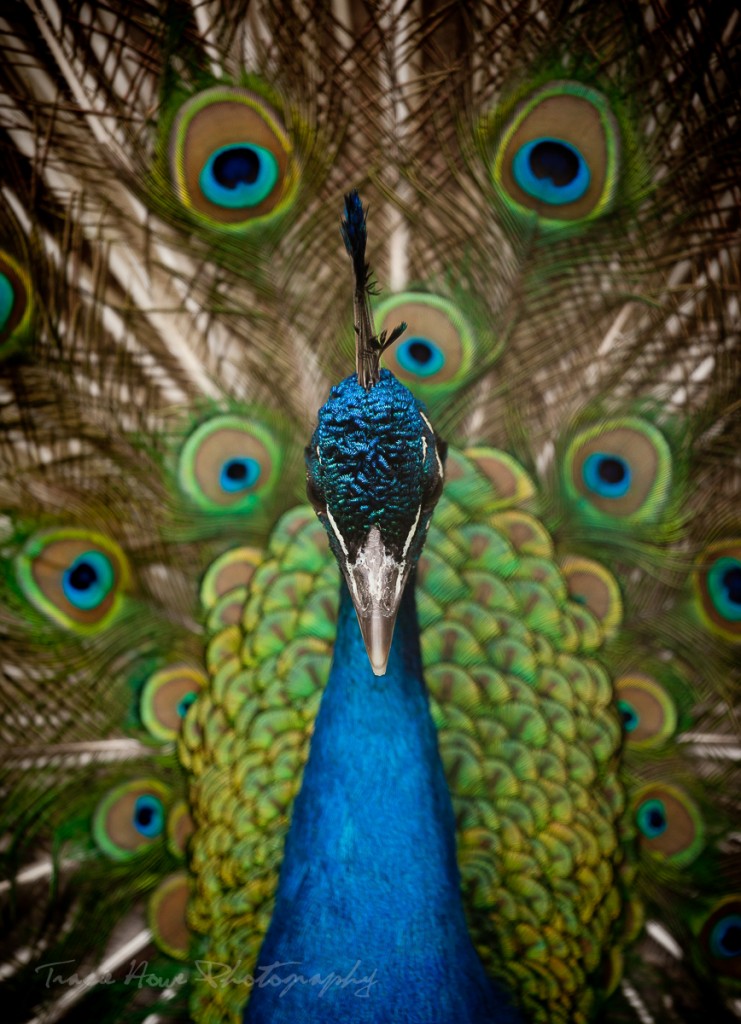
Photographed through a chain-link fence with a long lens at f2.8.
- Polarizers – Shooting through glass might be your only option. Use a polarizer, lens hood, or a dark jacket to block or minimize the reflection.
- Tripod – If you have a tripod, a long exposure may be your best bet. Even during the day, if you can slow your shutter speed down enough (shooting on manual with a neutral density filter will help with this), people walking through the scene can be blurred or they may not even show up. This of course doesn’t work with masses of people standing still, but hopefully you get the idea (if not, check out this post). This technique has saved many of my evening photos from being totally ruined. Just watch out for those people with cameras and bright LCD screens!
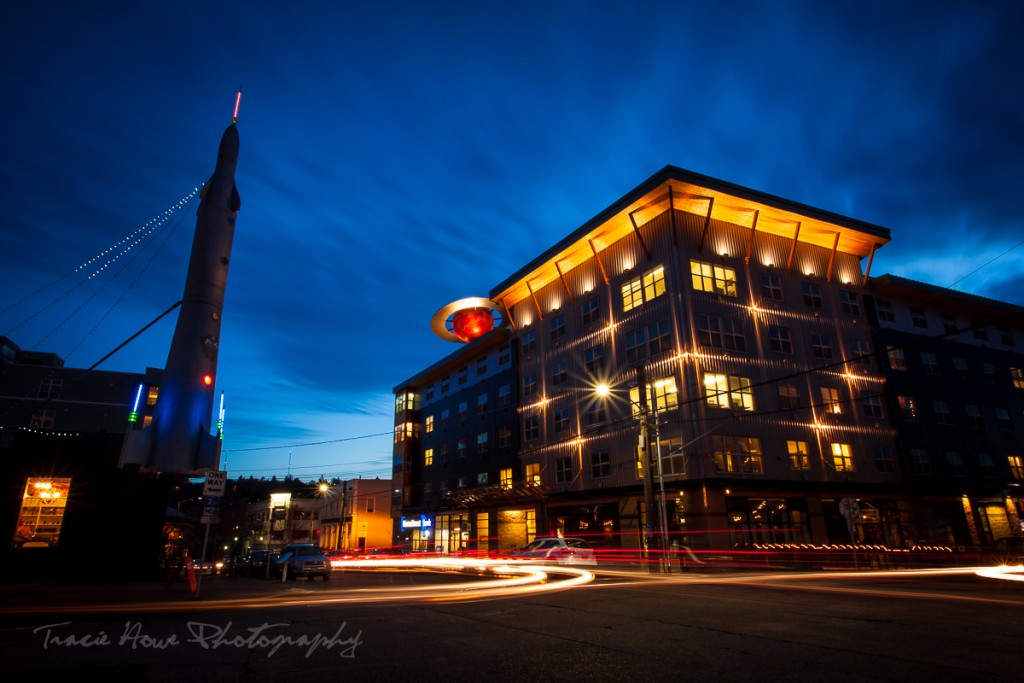
A long exposure allowed me to not only get cool car trails, but also to avoid any walking passersby.
- Photoshop – Yes, I said it. Programs like Photoshop (Lightroom and Aperture are lesser known to non-photographers) can allow you to edit out those little undesirables that you find in your otherwise priceless photo. I don’t make a habit of using Photoshop for this purpose, but if there is a bit of litter I hadn’t noticed or a person wandering into my shot in the distance, I won’t let that ruin an otherwise nice photo. You can of course crop out other distractions on the edges of your photo with other digital editing tools.
I edited out one person in the distance to save this photo.
An engagement shoot was happening just beyond the frame of this photo, so I had to compose and crop to avoid them… while staying out of the way of their photo shoot too. Not my ideal composition, but I was flexible and took the shot anyway.
My point is to think outside of the box, because you do have options. Too many times people get stuck with one idea of how something should be photographed. I’m guilty of it too! When you have been inspired by another photo of a place, it can be difficult not to recreate that very photo. Forcing yourself out of your photographic comfort zone is good practice anyway, but you may be faced with some situations where taking a different approach is your only option.
Final thoughts
Not all places hold these challenges, of course. There are many parts of the world that are untouched and often less accessible to the average sightseer. The wilderness offers a plethora of photographic opportunities for those who put the effort into getting out there. There are quiet cities, empty streets, and unspoiled landmarks that are just waiting to be photographed. You can spend your days exploring these places, and these alone, but where is the fun in that? Sure, the silent wild is a welcome respite from a bustling city, whether you’re a photographer or not, but why limit yourself to just these places?
Travel is about experiencing the world in a new way, and sometimes that means seeing the junk around the beauty. The important things to remember about traveling and photographing your travels is to manage your expectations, be prepared, and most importantly, be flexible.
Incorporating the people in this scene tells a lot more about this photo than it would have without the people.


Tami - You have shared a lot of great photography tips, and your photos are proof that you know what you’re doing! I especially love your photos of Seattle, my childhood home. And I see you found my favorite photographing site – Kerry Park!
traciehowe - Thank you, Tami! I appreciate your comment. Kerry Park is pretty spectacular! ;)
Karla | karlaroundtheworld - You have provided good insights in photography. It is really important to find your spot to create an interesting perspective. I still have to invest on a lens but in the mean time, I am trying to learn and master my camera and the tricks that comes with it.
traciehowe - Thanks, Karla! Yes, learning your own camera is half the battle. You may not want to hear this, but your manual can be quite useful. ;)
Katja - globetotting - Your photos are truly beautiful! What camera do you use out of interest? Love the photo of Bourbon Street and the market in Marrakech.
traciehowe - Thank you, Katja! I’ve used at least three different cameras for these photos. Most are from either a Canon 5DMII or 5DMIII.
Natalie Deduck - Thanks again Tracie!!
Another bunch of great photography tips!
I´m enchanted by your photos, amazing! Forwarding this post to my husband the official “photographer” of our blog!
Hope to meet you soon and get more exclusive tips! ;-)
All the best,
Nat
traciehowe - Thanks, Natalie! I love that you used “enchanting” to describe my photography! :) Happy to provide whatever tips you want when we meet!
Kimberly Erin @ Walkaboot.ca - I am still very much so learning how to take photos on this journey of becoming a full time blogger… nothing beats experience points eh
traciehowe - Thanks for you comment, Kimberly!
Sandrine - I like your way of composing the pictures. Today, we often try to hide many things because we think they will ruin the portrait or the landscape we’re shooting. You prove it can be interesting to integrate these things, especially in the last picture, because we share the good feeling of the people standing in the front of the bay.
traciehowe - Thank you, Sandrine. It can definitely be more interesting to integrate other things, particularly people.
Marta Grilo - Wow. Your photos are amazing and thanks for the tips. Definitely going to keep that in mind.
traciehowe - Thank you, Marta! I hope you do keep these tips in mind.
Elizabeth - Lovely photos and I can only aspire to take such great pictures. One area I continually struggle is with ice, i.e. glaciers, snow capped mountains. How do you get good shots when everything is white, clouds, ice, etc. Sometimes there is some blue sky but I can never get the white to balance. Something always looks overexposed. Any tips?
traciehowe - Thanks for your comment and great question! I would suggest a manual exposure instead of letting the camera guess how to expose the image. If you still have trouble, a graduated neutral density filter would probably help. This is a square or rectangular filter that sits in a holder in front of your lens (or you can hold it by the edges). One side of it is dark and the other side is clear. This allows you to properly expose a scene with extreme highlights and darks. It works best when one entire half of the scene is too bright, rather than just a tiny portion in the middle. I hope that helps! I can send you an example if you like. :)
Gabby | The Globe Wanderers - Wow, another batch of photography gold!
The peacock especially is perfect.
Love your tips and advice. I’ve often found the anomalies that pop up from time to time whilst composing your shot can be the stars of the show.
Great read :)
traciehowe - Haha! Thanks, Gabby!
Chris - I was thinking this all looked very familiar to me, but then realised I probably just read it when it came through on your email! ;-)
I love all that work, and obviously one thing that you do possess, is patience!
traciehowe - Thanks, Chris! Thanks for subscribing as well! And, yes, photography often has more to do with patience than anything else!
Julie @ Girl on the Move - First of all, these pictures are absolutely gorgeous! And I love the tips…especially the one in New Orleans about just incorporating the people into the picture…I’m never sure what to do when I don’t want people in my shot, so that’s a great idea!
traciehowe - Thanks, Julie! I never used to want people in my shots either, but sometimes I have to give in. ;)
Joe Ankenbauer - I’ve been waiting for part 2! Great post. Even better pictures! The pictures of Seattle made me miss it even more!
traciehowe - Thanks, Joe! Yeah, I save most of the photos for this post so I didn’t give away too much in the first one! ;) Come visit!
Sanket D. - Some of the pictures on here are quite stunning, guys! Seriously!
You know I read both parts and they are pretty useful, but I thought you missed out on one point that I struggle with a lot. I HATE being a tourist. I mean I hate the extra attention it brings, and so I feel extremely awkward or conscious about doing things that easily mark me out for a tourist. As a result, particularly when I’m traveling solo, taking photographs, particularly selfies is a little awkward and intimidating. I just wanted to put this out there, so others who feel the same way do not think they’re in this all by themselves. You’ve got company awkward, self-conscious weirdos! ;)
traciehowe - Thanks, Sanket. This post isn’t really about selfies, or being a tourist. If you mean that having a camera and taking photos of a place makes you look like a tourist, I would argue that I take photos in my home town almost every day. And I approach it exactly as I would a destination! So, you gotta get over that! ;)
Doreen Pendgracs - Thx for all the great tips, Tracie.
Your photographs are absolutely stunning. You are helping me aspire to raise the bar in my own travel photos.
However, there is a difference between photos that are artful (i.e. deliberately taking them without people) and photos that are marketable to publications like consumer travel magazines (as they are always looking to have people in the pics.) Spot just something to keep in mind for folks who may be writing travel as opposed to creating art.
One last thing to note: your site is extremely slow to load. I know that is likely b/c of the abundance of photos, but it’s so slow to load that if I didn’t know you, and want to see what you’re up to, I would have closed the site and moved on.
traciehowe - Thanks, Doreen! I would agree that there is a difference in intention. That is what I talked about in part 1, because my intention is to create those artful photos that will help inspire people to travel. I also did mention that I do try to include people in the photos for the reason you pointed out. As for my loading time, I am hoping that was just a one time thing… is it always like that for you? On my end it has been fine, but I noticed that it did slow down just the other day.
Gemma - Perfect timing, heading to Seattle at the start of October and have met a new friend who is really into photography so have been stealing tips from him too.
So you think that Seattle’s Kerry Park is a good place to take photos or have photos taken of it? Toronto newbie here.
Going to check out that photography tour also.
Thank you!
traciehowe - Thanks for your comment, Gemma! Yes, Kerry Park has excellent views and you should definitely go there! Which photo tour are you checking out?
Trisha Velarmino - I read part one and this is definitely helpful! Thanks for sharing! Xx
traciehowe - Thanks for your comment, Trisha!
The Educational Tourist - Wow! Your photos are amazing. My favorite is the peacock. After you mentioned the chain link fence I can so picture you doing that! What ever works, right? I’m inspirited to use your tips!
traciehowe - Thanks for your comment, Natalie!